What's inside
As an Amazon Associate I earn from qualifying purchases. This post may contain affiliate links at no extra cost to you.
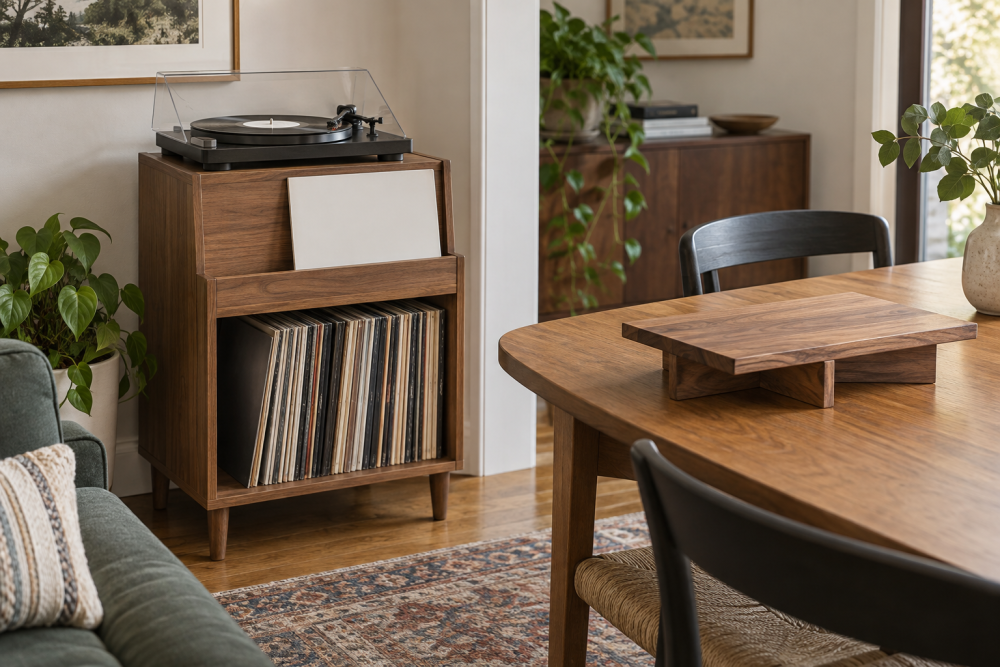
A compact record stand is useful when you want a small listening station without giving up floor space. This design holds about 50–70 records in the lower compartment, leaves room for a turntable on top, and uses a shallow front ledge to display the album currently playing. It is a manageable weekend project for a confident beginner, provided you can make reasonably square cuts.
Contents
Project overview
The finished stand is approximately 24 inches wide, 18 inches deep, and 30 inches high. The lower record compartment is open at the front and sized for standard 12-inch sleeves. A 3-inch-high display ledge runs across the front of the top panel. That ledge keeps a jacket upright without blocking the turntable controls.
| Material choice | Advantages | Drawbacks | Best for |
|---|---|---|---|
| 3/4-inch plywood | Stable, strong, easy to paint or veneer | Visible edge layers need treatment | Most builds |
| 3/4-inch solid pine | Easy to cut and inexpensive | Can cup, dent, or move with humidity | Painted stands and low-cost projects |
| Hardwood panels | Attractive edges and durable surface | More expensive and heavier | Clear-finished furniture |
For a first build, 3/4-inch plywood is the safest choice. A sheet of cabinet-grade plywood is more stable than construction plywood, but the cheaper material is fine if you will paint the stand and can select a flat sheet. Use 3/4-inch plywood edge banding to hide the exposed plies.
Materials and tools
You will need one 24-by-48-inch panel of 3/4-inch plywood, one 1-by-3 board for the display ledge, wood glue, 1 1/4-inch screws, sandpaper, and your chosen finish. Add four rubber or felt feet if the stand will sit on a hard floor. A pair of short screws or brad nails is enough to hold the ledge while the glue dries.
Useful tools include a circular saw with a straightedge guide, drill and bits, tape measure, square, clamps, and a random-orbit sander. A table saw makes repeated cuts easier, but it is not required. A circular saw straight-edge guide is a worthwhile purchase if your cuts are usually less than perfectly straight.
Cut list
Cut the following parts from 3/4-inch stock:
- Top: 24 by 18 inches
- Bottom: 24 by 16 1/2 inches
- Left and right sides: 16 1/2 by 28 1/2 inches
- Back panel: 24 by 28 1/2 inches, using 1/4-inch plywood
- Front display ledge: 24 by 3 inches, using 3/4-inch stock
- Front ledge support strip: 24 by 2 inches, using 3/4-inch stock
The bottom is slightly shallower than the top so the front ledge has visual room and the back does not become difficult to fit. The 28 1/2-inch side height, plus the 3/4-inch top, gives a finished height of 29 1/4 inches before adding feet.
Prepare the parts
Check every panel for bowing before cutting. Put the best-looking face on the outside or top. Mark the top and front edges of each side so you do not accidentally assemble a mirrored part.
Sand the cut edges with 120-grit paper, then finish with 180 grit. Do not heavily round the edges; a small eased edge is enough. If you are painting, fill plywood voids and screw holes with filler. If you are clear-finishing, apply edge banding before final sanding and trim it flush with a sharp blade or edge trimmer.
Assemble the cabinet
Set the sides on their back edges and position the bottom between them, with the bottom edge 1 1/2 inches above the floor. This creates a small toe space and keeps records away from dust on the floor. Apply glue to the mating edges, clamp the parts, and drive three evenly spaced screws through each side into the bottom. Drill pilot holes first to reduce splitting.
Check the cabinet for square by measuring both diagonals. If the measurements differ by more than 1/8 inch, push the cabinet into alignment before tightening the screws. A crooked cabinet can make the back panel buckle and can leave records leaning awkwardly.
Place the 1/4-inch back panel over the rear edges. Square the cabinet again, then attach the panel with glue and 1-inch brad nails or screws spaced about every 6 inches. The back panel is not just cosmetic: it prevents the sides from racking when records are removed.
Install the top and front ledge
Center the top on the cabinet, allowing a 3/4-inch overhang at the front and a 3/4-inch overhang at the back. The sides should be flush or have only a slight overhang, depending on your preference. Glue and screw the top from inside the cabinet so no fasteners show on the top surface.
For the ledge, place the 3-inch board across the front of the top, with its lower edge flush with the top’s front edge. Position the 2-inch support strip underneath it, inside the cabinet, and glue the two pieces together. Drive screws from inside the cabinet into the support strip. This creates a strong L-shaped stop without visible screw heads on the display face.
Keep the ledge 3 inches high. A taller rail can hide a turntable’s front controls, while a shorter one may not support thick gatefold jackets. Test the fit with one album before the glue sets.
Finish and use
Break every exposed corner with 180-grit sandpaper. Apply two or three thin coats of paint, polyurethane, or hardwax oil, sanding lightly between coats when the product requires it. A water-based finish dries faster and yellows less; oil-based finishes usually give pine a warmer color but take longer to cure.
Attach feet near the four corners, but keep them at least 1 inch in from the edges. Let the finish cure fully before loading records. Store albums upright, not leaning heavily against one side. If the compartment begins to sag under a large collection, add a center divider made from a 3/4-inch panel. It reduces the unsupported span and also separates records by category.
Common mistakes to avoid
Do not size the compartment exactly to a 12-inch record sleeve. Allow at least 1/2 inch of extra height and width for easy removal, protective sleeves, and manufacturing variation. Avoid using drywall screws; their brittle threads and heads are poorly suited to furniture. Finally, do not skip the back panel. An open-backed stand may look lighter, but it can rack noticeably when the records are pulled from one end.