What's inside
As an Amazon Associate I earn from qualifying purchases. This post may contain affiliate links at no extra cost to you.
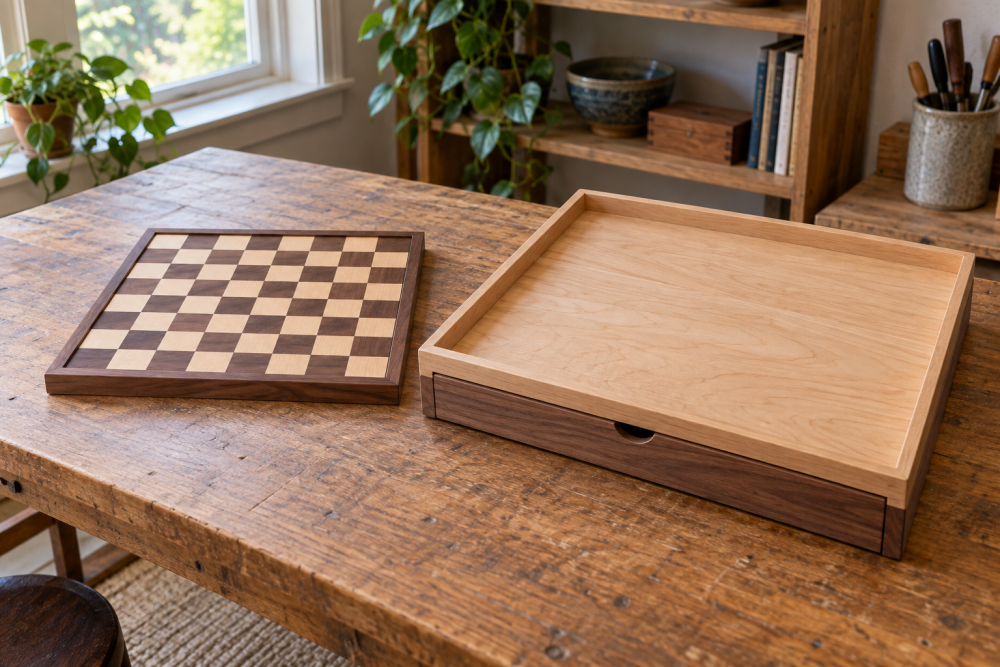
A wooden puzzle board gives you a dedicated work surface you can move without disturbing a nearly finished puzzle. The raised edge keeps pieces from sliding off, while a shallow drawer stores the puzzle and sorts pieces between sessions. This is a practical weekend project for a beginner with a saw, drill, and basic measuring tools.
The finished board described here is 24 by 30 inches, large enough for many 1,000-piece puzzles, with a 1-inch raised rim and one full-width storage drawer underneath. Check your puzzle’s assembled dimensions before cutting. Some 1,000-piece puzzles need more than 20 by 27 inches, especially if the image has an irregular border.
Contents
Materials and design choices
Use 1/2-inch plywood for the puzzle surface and drawer bottom, plus 1-by-2 boards for the rim. The rim does not need to be tall; 3/4 to 1 inch is enough to stop loose pieces while still letting you slide a puzzle onto a table. Avoid construction lumber for the work surface. It is often cupped, rough, and prone to splinters.
| Material | Advantages | Trade-offs |
|---|---|---|
| 1/2-inch sanded plywood | Flat, stable, and affordable | Edges need covering or careful sanding |
| 1/2-inch MDF | Very smooth and inexpensive | Heavy, dusty to cut, and vulnerable to moisture |
| 1/4-inch plywood | Light and cheap | Can flex unless supported underneath |
For most builders, 1/2-inch sanded plywood is the sensible choice. A sanded plywood project panel is easier to handle than a full sheet. If you build in a damp garage or basement, plywood is safer than MDF.
Cut list and tools
For a 24-by-30-inch board, cut the following parts:
- One puzzle surface: 24 by 30 inches, 1/2-inch plywood
- Two long rim pieces: 30 by 1 inch, 3/4-inch-thick stock
- Two short rim pieces: 22 inches by 1 inch, 3/4-inch-thick stock
- Two side rails for the drawer: 28 by 2 inches
- One drawer front and one drawer back: 23 by 2 inches
- Two drawer ends: 28 by 2 inches
- One drawer bottom: 22 by 28 inches, 1/4-inch plywood
The drawer dimensions leave roughly 1/8 inch of clearance on each side inside a 24-inch-wide box. Measure the actual thickness of your lumber before cutting. A board sold as 1 inch thick may measure closer to 3/4 inch, and that affects every drawer dimension.
You will also need wood glue, 1-inch screws, 1 1/4-inch screws, sandpaper from 120 to 220 grit, and a finish. A water-based polyurethane wood finish dries quickly and adds little color. Use a circular saw with a straightedge, or a table saw, plus a drill and countersink bit.
Build the puzzle board
Start by cutting the plywood surface accurately. Check it with a framing square; even a 1/8-inch out-of-square cut makes the rim look uneven. Lightly break the sharp edges with 180-grit sandpaper, then sand both faces. Do not round over the top edges, because puzzle pieces are easier to push against a crisp, straight boundary.
Lay the rim pieces around the surface and dry-fit them before applying glue. The long pieces run along the 30-inch sides. The short pieces fit between them, giving the assembled rim an outside size of 30 by 24 inches. Apply a thin glue line, clamp or tape the corners, and check the diagonals. If both diagonals are equal, the frame is square.
Reinforce each corner with two 1-inch screws driven from the outside into the adjoining piece. Drill pilot holes first to prevent splitting. Wipe away glue squeeze-out immediately; dried glue can show through stain and create shiny patches.
If you want extra protection against sliding pieces, add a thin cork or felt sheet to the surface. Keep it flat and avoid thick fabric, which can make the board feel soft and cause puzzle pieces to separate when you move it. A self-adhesive cork sheet is optional, not essential.
Build and fit the storage drawer
Assemble the drawer as a simple box. Position the two side pieces between the front and back pieces, apply glue, and fasten each joint with two 1 1/4-inch screws. Keep the box on a flat surface while fastening it. Measure the diagonals before the glue sets; a crooked drawer will bind even if the opening is correctly sized.
Attach the 1/4-inch bottom to the underside with glue and 3/4-inch screws or brads. Space fasteners about 6 inches apart. Pre-drill near the plywood edges, because thin plywood splits easily. Sand the drawer edges until they slide freely. Leave at least 1/16 inch of total side-to-side clearance; seasonal wood movement and finish thickness can eliminate a tighter fit.
For a basic drawer pull, drill a centered finger hole in the drawer front. This costs nothing and cannot snag on a table edge. A small small wooden drawer pull is easier to use, but it increases the overall depth and may catch when the board is stored upright.
Install the drawer support
Fasten two 28-inch support strips underneath the puzzle surface, parallel to the long sides. Set them about 1 1/2 inches in from each edge, or position them to match the drawer sides. The supports keep the drawer centered and stop it from dropping out. Leave the front open so the drawer can slide in.
Test-fit the drawer before finishing. It should move with light hand pressure and remain supported when pulled out halfway. If it binds, look for a high spot rather than immediately widening the entire opening. Sand the specific area, then test again. A drawer that is too loose will rack and may fall when loaded with several hundred puzzle pieces.
Sand and finish the board
Sand exposed edges through 180 or 220 grit. Round only the outside corners slightly; sharp corners are uncomfortable to carry and can damage furniture. Apply two or three thin coats of water-based polyurethane, sanding lightly between coats. Finish the drawer separately, including its bottom, to reduce moisture absorption.
Do not apply a thick finish to the drawer runners or support surfaces. Excess finish can make a previously smooth drawer stick. If the board will live in a heated house, let the finish cure for at least 48 hours before use. In a cool or humid workshop, allow more time.
Common mistakes to avoid
The most common failure is building the board too small. Measure the assembled puzzle, not the box, and add at least 1 inch of working space on every side if you want room to sort pieces. Another problem is an edge that is too high; a 2-inch rim makes it awkward to reach the center. Finally, do not skip pilot holes in the rim and drawer. Small screws driven into thin stock are likely to split the wood, leaving a weak joint and a rough surface.