What's inside
As an Amazon Associate I earn from qualifying purchases. This post may contain affiliate links at no extra cost to you.
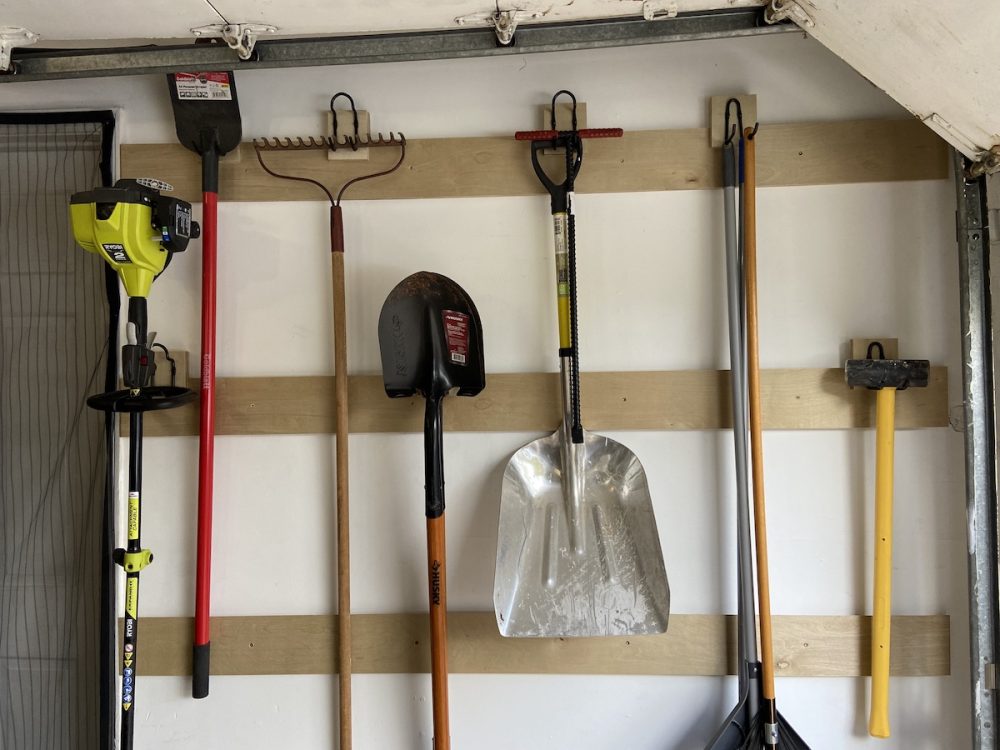
This simple garden tool holder keeps shovels, rakes, hoes, and hand tools off the floor while leaving the rack easy to remove from the wall. The back uses a French cleat: a pair of matching bevels that lock together under the weight of the holder. It is a good weekend project for a beginner with a saw, drill, and basic measuring tools.
Plan to spend about two to three hours building and finishing it, plus drying time. Late winter or early spring is a useful time to make one, before muddy tools and long-handled equipment take over the shed.
Contents
Materials and tools
Use straight, dry 3/4-inch plywood for the back and shelves. Construction lumber can work, but warped boards make it harder to keep the cleat and tool slots aligned. A 1×6 board is nominally 3/4 inch thick and is suitable for the lower shelf or front rail.
- One piece of 3/4-inch plywood, 24 by 36 inches
- One 1×6 board, 24 inches long
- One 1×4 board, 24 inches long, for the tool rail
- 1 1/4-inch wood screws
- 2 1/2-inch screws for attaching the cleat to wall studs
- Wood glue
- Sandpaper, a drill, a countersink bit, and a saw
- Stud finder, level, tape measure, and pencil
A French cleat router bit makes a neat bevel, but it is not necessary. A table saw, circular saw with a guide, or miter saw can cut the same 45-degree bevel. If you use a circular saw, clamp a straightedge and make a test cut first.
| Material | Advantages | Drawbacks | Best use |
|---|---|---|---|
| 3/4-inch plywood | Stable, strong, easy to paint | Edges need sanding or edging | Back panel and shelf |
| Pine boards | Cheap and easy to cut | Can warp or split near screw holes | Rails and light-duty holders |
| Solid hardwood | Durable and attractive | More expensive; unnecessary for most sheds | Visible trim or a high-use shop |
Size and layout
The dimensions below make a holder 24 inches wide, 36 inches tall, and roughly 6 inches deep. That is enough for several long-handled tools without taking over a narrow shed wall.
Cut the plywood back to 24 by 36 inches. Cut the 1×6 shelf to 24 inches and the 1×4 rail to 24 inches. The shelf will sit about 8 inches above the bottom edge. The rail will sit about 20 inches above the bottom edge and will hold individual tool slots.
Before cutting slots, lay your tools against the rail. Leave at least 2 inches between the centers of adjacent slots. A shovel handle may need a 1 1/4-inch opening, while a narrow cultivator or hoe handle may need only 3/4 inch. Measure the actual handles rather than assuming they are uniform.
Cut the French cleat
Rip a 4-inch-wide strip from a straight piece of plywood or lumber. Cut the strip lengthwise at 45 degrees so it becomes two matching cleats. The bevel should leave a long point on the front face and a flat back face on each piece.
One cleat attaches to the top rear of the tool holder, with its bevel facing down and toward the wall. The other cleat attaches to the wall, with its bevel facing up and toward the room. When the holder is lowered onto the wall cleat, the two bevels interlock.
Mark the cleat clearly before drilling. Reversing one piece is a common failure mode: the holder may appear to sit on the wall cleat but will not lock securely. Test the fit on the bench before installing anything.
Assemble the holder
Sand all cut edges, especially the lower corners and the edges of the tool slots. A small 1/8-inch roundover or chamfer prevents splinters when you reach into the rack.
Position the shelf across the lower front of the back panel, 8 inches above the bottom. Apply glue to the joint, drill pilot holes, and drive 1 1/4-inch screws from the back. Use three screws across the width. The shelf should project about 5 1/2 inches from the back panel.
For the rail, mark the tool openings along the top edge of the 1×4. Drill 1 1/4-inch holes with a wood hole saw set, then cut from the top edge down to each hole with a jigsaw or handsaw. This creates U-shaped slots that let you lift tools out without threading the handles through closed holes.
Fasten the rail to the front of the back panel, about 20 inches above the bottom. Keep the rail level and use at least three screws. If your tools are unusually heavy, add a second rail lower down or reduce the slot spacing.
Attach the holder-side cleat near the top rear. Put the wide flat face against the back panel and keep the cleat parallel to the top edge. Use glue and four screws, with pilot holes to prevent splitting. Do not rely on glue alone.
Mount it safely
Locate two wall studs and mark their centers. The wall cleat should be at least 20 inches long so it crosses two studs. Hold it level, with the bevel facing upward, and drive 2 1/2-inch screws through the cleat into the studs. Use a washer or large screw head if the cleat has oversized holes.
Do not mount a loaded rack to drywall anchors alone. A few hand tools may be fine on a rated anchor, but long-handled tools create leverage as they are removed and replaced. If studs are not located where you need them, install a wider plywood mounting board across the studs first, then screw the wall cleat to that board.
Lift the holder onto the cleat and check that it sits flat against the wall. Add one screw through the lower back into a stud or mounting board if the rack can swing or lift. This is optional for a lightly loaded rack, but useful in a busy shed.
Finish and use
Round the front edges, fill visible screw holes, and apply two coats of exterior paint or an exterior water-based finish. The cheaper option—leaving the plywood unfinished—is acceptable in a dry indoor shed, but exposed end grain absorbs moisture quickly in an unheated or damp space. Seal the bottom edge and shelf edges particularly well.
A small can of exterior wood paint is enough for this project. Let the finish cure before storing tools against it; otherwise damp soil and paint can stick together.
Keep the heaviest tools closest to the back panel and avoid loading the shelf with bags of soil. If the cleat loosens, the shelf cracks, or the rack pulls away from the wall, unload it immediately and inspect the screws and studs. A French cleat is strong when it is properly fastened, but it cannot compensate for a weak wall connection or a warped, split cleat.