What's inside
As an Amazon Associate I earn from qualifying purchases. This post may contain affiliate links at no extra cost to you.
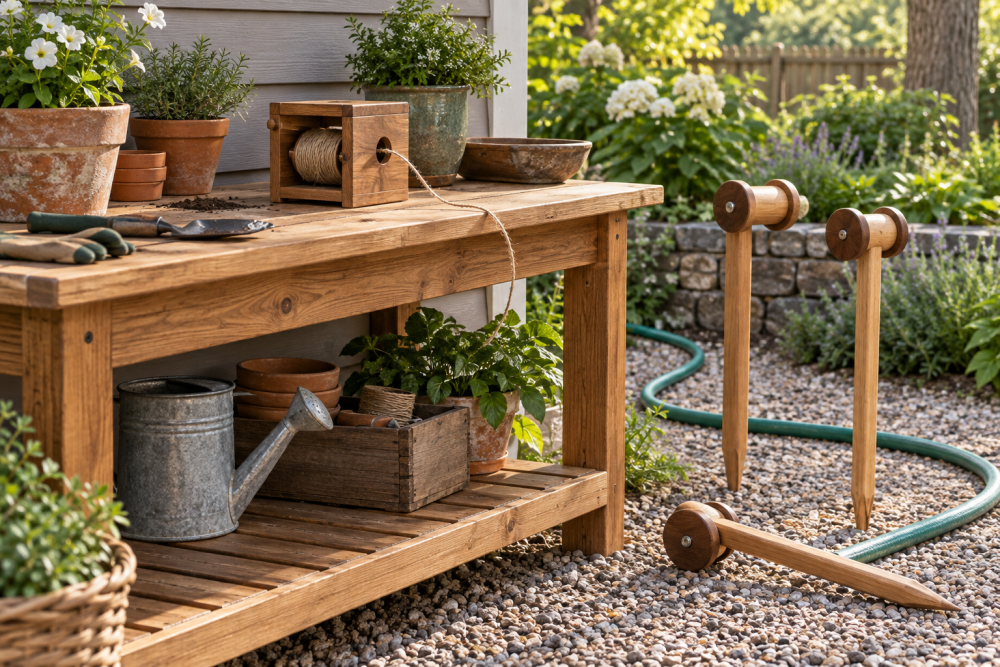
A hose guide keeps a dragged hose from scraping across flower beds, catching on a corner, or bending sharply beside a faucet. This simple stake-mounted version uses a rotating wheel or smooth loop at the top so the hose can change direction without being pulled across the ground. It suits a beginner with a drill and saw, and most of the work is cutting and sanding.
Contents
Choose a design that fits your hose
For a straightforward build, make a wooden stake with a short crosspiece at the top and fit a freely rotating wheel between two side plates. The hose rests in the wheel’s groove and rolls as you pull it. A fixed, rounded U-shaped guide is simpler, but the hose slides over it instead of rolling; that’s fine for occasional light use, though it adds friction and can wear the hose sooner.
Use rot-resistant wood such as cedar, or use ordinary exterior-grade lumber if you’re willing to replace the stake when it deteriorates. Avoid thin plywood outdoors: exposed edges soak up water and delaminate. For the rolling version, buy a small grooved pulley or hose-guide wheel sized for a garden hose. Check that its groove is wide enough for your hose and that the axle hole matches the bolt you plan to use.
Materials and tools
For one guide, gather a 24- to 30-inch length of 1-by-2-inch cedar or pressure-treated lumber for the stake, two pieces of 1-by-2-inch stock about 5 inches long for the wheel supports, one grooved wheel, and a 1/4-inch galvanized or stainless bolt with washers and a locknut. Add two exterior-rated screws for the supports. A 3-inch-wide stake is easier to drive into firm ground than a narrow strip; if using 1-by-2 lumber, cut a point on one end and don’t hammer directly on its top.
You’ll need a saw, drill, bits sized for the screws and axle, screwdriver, pencil, tape measure, and sandpaper. A grooved hose-guide wheel is the part most likely to vary in size, so buy it before drilling the axle holes. A cordless drill is sufficient; there’s no need for a specialty tool.
Compare the two guide styles
| Style | What it does well | Limitations | Best for |
|---|---|---|---|
| Rotating wheel | Reduces dragging and hose abrasion at the turn | More parts; wheel can seize if packed with grit | Frequent watering or a tight corner |
| Rounded fixed loop | Cheap, quick, and easy to make from a smooth metal rod | Hose slides over the guide and may snag on rough edges | Light use and a small budget |
| Store-bought stake guide | Ready to install; often includes a decorative top | Quality and stake length vary; check hose clearance | Anyone who would rather skip cutting and drilling |
A fixed guide can be made with a length of smooth, corrosion-resistant rod bent into a broad U, then attached to a stake. Don’t use sharp-edged scrap metal or a narrow loop: either can kink or abrade the hose. For a ready-made option, compare a garden hose guide stake with your build cost, especially if you need only one.
Cut and prepare the stake
Measure and cut the stake to 24–30 inches. Cut a point on one end, leaving a blunt tip rather than a needle point; a bevel on two opposite faces is enough to help it enter the soil. Sand the upper end and any corners the hose might touch. If the lumber is rough or splintered, smooth it carefully—splinters can catch the hose jacket.
For the wheel supports, cut two equal pieces about 5 inches long. Mark a centered axle hole in each piece, roughly 1 inch from the top. Drill both holes at the same height. Clamp the pieces together while drilling if practical; mismatched holes can tilt the wheel and make it rub. Use a drill bit that lets the bolt turn freely without excessive side play.
Assemble the wheel guide
Position the supports on opposite sides of the stake, with their axle holes aligned and enough space between them for the wheel to spin without touching either support. Drive one exterior screw through each support into the stake. Pre-drill screw holes to reduce splitting, particularly near the ends of the short supports.
Fit a washer on the bolt, pass it through one support, the wheel, and the other support, then add another washer and a locknut. Tighten the nut until the wheel has only a little side-to-side movement and spins freely. A common failure is overtightening: the wheel binds, so the hose drags anyway. If the bolt is too long, cover exposed threads or trim them so they cannot snag the hose.
Before putting the guide outdoors, spin the wheel by hand and run a short section of hose through it. Check that the hose sits in the groove rather than riding over the wheel’s edge. If it pinches, choose a wider wheel or increase the clearance between the supports; don’t force a mismatched wheel into service.
Install and test it in the garden
Place the stake where the hose changes direction, not directly in the path where you walk or mow. Push it into firm soil until the wheel is around 8–12 inches above ground, adjusting for the height of your hose and planting beds. In hard ground, water the spot first or make a starter hole with a digging bar. Don’t hammer the assembled wheel: the impact can loosen screws or bend the axle. If the stake needs a mallet, remove the top assembly or protect the stake’s end with a scrap block.
Pull the hose around the guide with water off, then test again under normal use. If the stake leans, move it to firmer ground or replace it with a wider or longer stake. If the wheel stops turning after a season, rinse out soil and check for corrosion or a pinched axle. A small amount of suitable outdoor lubricant on the axle can help, but keep oily products away from plants and the hose surface.
Weather, upkeep, and when to keep it simple
Wooden stakes eventually soften where they meet wet soil. Store the guide in a shed over winter if the ground freezes or stays saturated, or treat unfinished wood with an exterior finish suitable for garden use. Recheck screws and the axle at the start of each watering season. Replace the guide if the stake splits or the wheel develops sharp edges.
If you water only once in a while and the hose makes a gentle turn, a smooth fixed loop or an inexpensive store-bought guide is enough. Build the wheel version when you pull a heavy hose around the same corner often and want to reduce scraping. Either way, a rounded contact surface and a firmly planted stake matter more than decorative details.