What's inside
As an Amazon Associate I earn from qualifying purchases. This post may contain affiliate links at no extra cost to you.
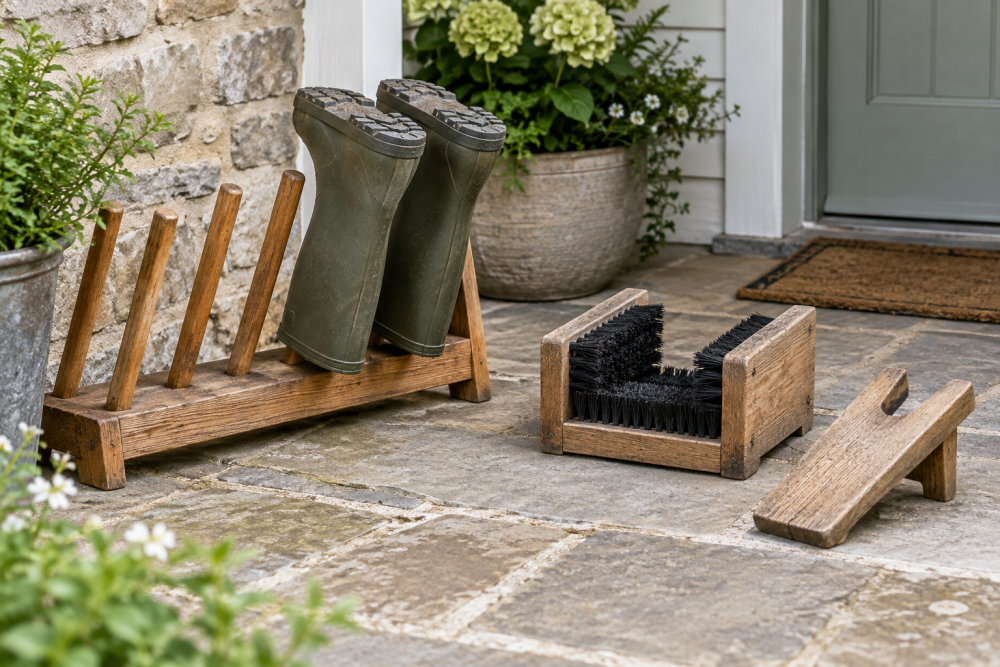
A simple wooden rain boot rack keeps wet footwear off the floor and gives each boot enough space to dry. This version uses a narrow board with wooden pegs instead of complicated shelves. It is a good weekend project for a beginner, takes roughly two to three hours excluding finish drying time, and can be sized for two to six pairs of boots.
Contents
Project overview
The rack is a wall-mounted board with pairs of angled pegs. Each peg supports one boot by its opening, so air can circulate inside while water drips onto a tray or washable floor mat below. A 36-inch-long rack will usually hold four pairs of adult boots, depending on how wide the boots are.
| Rack length | Typical capacity | Best use |
|---|---|---|
| 24 inches | Two pairs | Small entryways or a porch |
| 36 inches | Four pairs | Most families |
| 48 inches | Five to six pairs | Busy mudrooms |
Mount the rack at least 12 inches above the floor if you want to place a drip tray underneath. For children’s boots, lower it to about 8 inches. Leave at least 9 inches between peg pairs, and check the actual boot widths before drilling.
Materials and tools
Use a straight 1×6 board, which is about 5 1/2 inches wide and 3/4 inch thick. Pine is inexpensive and easy to work, while poplar gives you a smoother painted surface. Cedar resists moisture better but costs more and can be softer around screw holes.
- One 36-inch length of 1×6 lumber
- Eight wooden dowels, 1 inch in diameter and 6 inches long
- Eight matching wooden end caps, or sanded dowel ends
- Wood glue rated for interior or exterior use
- Two or three wall-mount screws, appropriate for your wall type
- Sandpaper in 120- and 180-grit
- Drill, 1-inch drill bit or Forstner bit, and a smaller pilot bit
- Combination square, tape measure, pencil, clamps, and a level
If you do not already own dowels, compare 1-inch wooden dowels by diameter and length rather than buying the cheapest bundle. A slightly undersized peg can wobble in its hole, while an oversized one will split the board during assembly. A wood Forstner bit set is useful for clean, flat-bottomed holes, but a sharp spade bit is fine for a one-time project if you drill slowly.
Cut and mark the board
Cut the board to 36 inches, or adjust the length to suit your wall. Remove splinters from the cut ends. Mark a horizontal centerline 2 3/4 inches up from the bottom edge. This places the peg centers near the middle of the board.
Mark peg positions in pairs. For a four-pair rack, use centers at 4, 13, 22, and 31 inches along the board. Put the two pegs in each pair 2 1/2 to 3 inches apart. The wider spacing works better for large rubber boots; the narrower spacing gives more capacity for children’s footwear.
Keep the outer peg centers at least 3 inches from each end. Drilling too close to an end is a common failure point: the board can split, especially when the pegs are tapped into tight holes.
Drill the pegged supports
Set the board on scrap wood and drill the peg holes at a slight upward angle, about 10 to 15 degrees. The peg should rise toward the wall. This angle helps keep a boot from sliding off, but do not make it steep; water needs to drain out rather than collect inside the boot.
Drill each hole about 1 1/2 inches deep. Mark the bit with painter’s tape so the holes stay consistent. Drill from the finished face of the board, keeping the bit aligned with your layout marks. A drill press makes this easier, but a hand drill works if you use a square as a visual guide.
Test one hole with a scrap of dowel. The fit should be snug enough that the dowel does not fall out, but not so tight that it requires heavy hammering. If the hole is slightly loose, glue will usually compensate. If it is badly oversized, cut a new peg or use a larger dowel rather than relying on a thick layer of glue.
Assemble the rack
Dry-fit every peg before applying glue. Round over the exposed ends with sandpaper so they do not catch boot openings or scratch hands. Apply glue to the buried portion of each peg, twist it into place, and align all pegs at the same angle. Wipe away squeeze-out immediately with a damp cloth.
Let the glue cure according to its label, usually at least 30 minutes before moving the rack and several hours before loading it. Do not drive nails through the front of the board to hold the pegs. They can split the dowels and leave sharp metal near the boots.
Sand and finish
Sand the board with 120-grit paper, then finish with 180-grit. Pay extra attention to the board edges, peg ends, and drilled holes. A rough edge will eventually abrade rubber or catch fabric boot liners.
For a heated mudroom, interior paint or polyurethane is sufficient. For a damp porch, use an exterior-rated paint or spar urethane on every surface, including the end grain. Apply two or three thin coats and sand lightly between coats when the label recommends it. A cheap clear spray finish is acceptable for a temporary indoor rack, but it will not protect pine from repeated standing water.
Allow the finish to cure fully before installation. “Dry to touch” does not mean the coating is hard enough for wet boots; curing may take several days.
Mount it securely
Find wall studs and position the rack so at least two screws enter solid wood. Use washers under the screw heads to prevent the fasteners from pulling through the board. If studs do not line up, use heavy-duty hollow-wall anchors rated for more than the rack’s expected load. Ordinary lightweight plastic anchors are a poor choice because wet boots create repeated downward and outward force.
Hold the rack level, mark the mounting holes, drill pilot holes, and drive the screws without overtightening. A 36-inch rack loaded with wet boots can weigh 20 pounds or more. Test it by pulling downward firmly before putting footwear on it.
Use and maintain the rack
Place a boot tray or washable rubber mat below the pegs. The rack supports boots; it does not replace drainage. Leave space between the boots and avoid hanging them while packed with mud, which can hold moisture against the wood.
Inspect the pegs at the start of each wet season. Tighten mounting screws, check for movement, and touch up worn finish. If a peg loosens, remove it, clean out old glue, and reinstall it with fresh glue rather than simply adding glue around the joint. That repair addresses the joint instead of hiding the problem.