What's inside
- What Makes a Good Indoor Winter Project
- 1. Edge-Grain Cutting Board (Beginner, 4-6 Hours)
- 2. Floating Shelves With Hidden Brackets (Beginner to Intermediate, 6-8 Hours)
- 3. Shaker-Style Step Stool (Intermediate, 8-12 Hours)
- 4. Stackable Storage Crates (Beginner, 5-7 Hours Per Crate)
- Comparison: Which Weekend Project Fits You
- Indoor Shop Tips for Winter Builds
- What Makes a Good Indoor Winter Project
- 1. Edge-Grain Cutting Board (Beginner, 4-6 Hours)
- 2. Floating Shelves With Hidden Brackets (Beginner to Intermediate, 6-8 Hours)
- 3. Shaker-Style Step Stool (Intermediate, 8-12 Hours)
- 4. Stackable Storage Crates (Beginner, 5-7 Hours Per Crate)
- Comparison: Which Weekend Project Fits You
- Indoor Shop Tips for Winter Builds
As an Amazon Associate I earn from qualifying purchases. This post may contain affiliate links at no extra cost to you.
Winter is the best season to catch up on small builds, but indoor work changes the rules. Dust control matters more, glue and finish cure slower, and you want projects that fit on a benchtop or assembly table without needing to mill 8-foot boards in a freezing garage. The four projects below are all finishable in a single weekend (roughly 6-12 hours of shop time), don’t require a full-size table saw, and sell or gift well if you batch a few at once.
As an Amazon Associate we earn from qualifying purchases at no extra cost to you.




Contents
- What Makes a Good Indoor Winter Project
- 1. Edge-Grain Cutting Board (Beginner, 4-6 Hours)
- 2. Floating Shelves With Hidden Brackets (Beginner to Intermediate, 6-8 Hours)
- 3. Shaker-Style Step Stool (Intermediate, 8-12 Hours)
- 4. Stackable Storage Crates (Beginner, 5-7 Hours Per Crate)
- Comparison: Which Weekend Project Fits You
- Indoor Shop Tips for Winter Builds
What Makes a Good Indoor Winter Project
A good winter project stays under 36 inches in any dimension, uses pre-milled or S4S lumber so you can skip heavy dimensioning indoors, and relies on joinery you can do without prolonged outdoor routing. Cold is the real enemy: most PVA wood glues need a shop temperature above 50-55°F for 24 hours to reach full strength, and oil-based polyurethanes can take twice as long to cure below 65°F. If your shop is an unheated garage or basement under 60°F, plan for water-based finishes and give glue-ups an extra day before stressing the joint. You also want minimal open-grain sanding. Sanding generates the finest, most airborne dust, so projects that need only 120 to 220 grit progression are more pleasant in a closed house.
1. Edge-Grain Cutting Board (Beginner, 4-6 Hours)
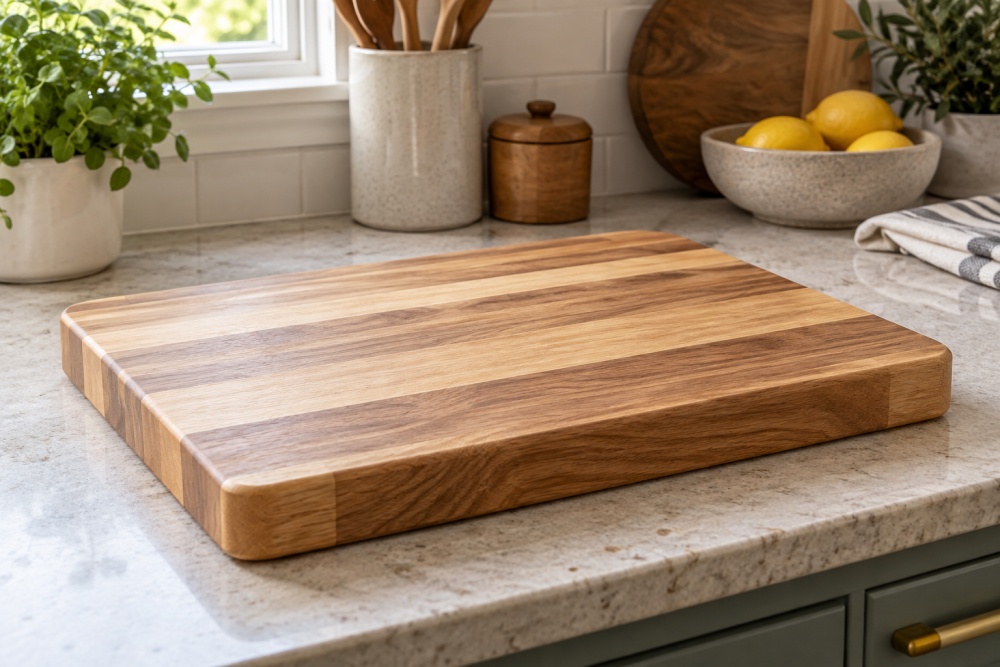
An edge-grain board is the classic winter warm-up because the failure modes are cheap to learn. You need 4-6 board feet of hard maple, walnut, or cherry, cut into 1-1/4 inch to 1-3/4 inch strips. At 12 inches wide by 16 inches long by 1-1/4 inch thick, a board uses about $35-60 in hardwood at retail prices if you buy S4S. Avoid end-grain for your first one. End-grain looks great but doubles glue-up time, requires a drum sander or very flat clamping to avoid lippage, and will dull a planer if you try to clean it up that way.
Glue with Titebond III for water resistance, alternate the grain direction every other strip to reduce cupping, and clamp for at least 60 minutes before unclamping but don’t sand or cut for 24 hours. The most common failure is a board that warps a week later because boards were not jointed straight or clamping pressure was uneven. A jointer is nice, but a simple hand plane or a straight-line jig on a small circular saw fixes most bows. After flattening, sand 120, 150, 180, then 220, and flood with mineral oil and board wax. You can finish it entirely indoors with almost no odor. A decent random orbit sander with vacuum attachment is worth it here; the cheaper $40-50 models vibrate more but sand just as well for boards, so don’t overspend unless you’re doing this weekly.
2. Floating Shelves With Hidden Brackets (Beginner to Intermediate, 6-8 Hours)
Two 24 to 36-inch floating shelves teach you accurate drilling, wall-anchor planning, and edge-banding without taking up floor space. Build them as hollow torsion boxes: a 3/4-inch plywood top and bottom with a solid wood front edge, and internal blocking where the bracket rods will go. That construction stays light (about 5-7 pounds per shelf) and won’t sag like a solid 1-1/2 inch thick board, which would also cost 3x as much.
Use 1/2 inch by 4-1/2 inch heavy-duty floating shelf brackets rated for at least 50 pounds per pair when screwed into studs. The failure mode here isn’t the shelf, it’s the wall. Drywall anchors alone will rip out under books or cast iron. You must hit at least one stud per shelf, ideally two, and drill the shelf holes 1/64 inch oversize so you can adjust for walls that are out of square. Cut your carcass parts to within 1/32 inch; gaps at the mitered edges show badly under paint. For clean crosscuts in a small shop, a track saw or a miter saw with a dust bag and a sharp 60-tooth blade keeps dust down versus a table saw. If you already own a good circular saw, a clamp-on straight edge is fine and saves the purchase.
3. Shaker-Style Step Stool (Intermediate, 8-12 Hours)
A small step stool is more interesting than a board and more useful than most decor projects. The classic Shaker design is 17 inches long, 10 inches wide, and 10-11 inches tall, with dovetailed or wedged through-tenons joining the legs to the top. That joint is strong without fasteners and handles racking when someone stands off-center.
Make it from 3/4-inch poplar if you’re painting, or white oak or ash if you want a clear finish. Poplar costs about $3-4 per board foot versus $7-10 for white oak, and it’s easier to cut dovetails in. The top is typically 13-14 inches long by 10 inches wide, the two sides are 10 inches tall. Lay out three dovetails or two wedged tenons per side. Cut tails with a Japanese pull saw and chop waste with a 1/2-inch chisel; you don’t need a dovetail jig for two joints. Dry-fit first. The usual mistake is making the dovetail too tight, which splits the top when you drive it home in dry winter air. Aim for a hand-press fit that seats with two or three mallet taps, then glue. Leave the inside corners slightly relieved with a 1/8-inch roundover to prevent stress cracks. Finish with two coats of water-based polyurethane; it cures in 2-4 hours per coat at 70°F and doesn’t stink up the house like oil-based.
4. Stackable Storage Crates (Beginner, 5-7 Hours Per Crate)
If you need something to justify the shop time, stackable crates for firewood, blankets, or pantry storage are fast and forgiving. A good size is 18 inches long by 12-1/2 inches wide by 10 inches tall, built from 1×6 and 1×8 pine or 1/2-inch Baltic birch plywood. Pine is $1.50-2.50 per board foot and available at any home center, while plywood gives you cleaner corners but needs edge banding or solid-wood caps.
Join the sides with glue and 1-1/4 inch brads or with pocket screws if you want to avoid clamping. Pocket holes are faster but leave visible holes inside the crate unless you plug them. For pine crates, brads plus glue are strong enough for 30-40 pounds of load; the bottom takes the stress, so use a 1/4-inch plywood bottom captured in a 1/4-inch dado 3/8 inch up from the base. Without that dado, the bottom will sag and pull the nails out after one season of heavy blankets. Sand to 150 grit only; any finer is wasted under paint or rough use. A crate is also the best project to test a new finish sprayer or try milk paint indoors with low odor.
Comparison: Which Weekend Project Fits You
Choose based on available tools, how much sanding you tolerate indoors, and whether you want a giftable item or shop utility.
| Project | Active Time | Skill Level | Core Tools Required | Lumber Cost (One Unit) |
|---|---|---|---|---|
| Edge-Grain Cutting Board | 4-6 hours | Beginner | Clamps, sander, circular or miter saw | $35-60 |
| Floating Shelves (pair) | 6-8 hours | Beginner / Intermediate | Drill, level, saw, brad nailer | $40-75 |
| Shaker Step Stool | 8-12 hours | Intermediate | Hand saw, chisels, mallet, drill | $25-55 |
| Stackable Crate | 5-7 hours | Beginner | Drill, saw, brad nailer or pocket jig | $15-35 |
Indoor Shop Tips for Winter Builds
Dust and cure time will make or break an indoor weekend. Hook any sander or saw to a shop vacuum with a HEPA filter or at least a dust bag, and hang a simple $30 box fan with a 20×20 inch MERV-13 filter to catch the fines that hang in the air for hours. Work in a basement or spare room? Lay down a canvas drop cloth and seal the HVAC return with a filter so you don’t distribute dust through the house.
For finishes, stick to water-based poly, hardwax oil, or mineral oil until spring. They cure at lower temperatures and meet indoor air quality needs. If you must use oil-based poly, do it in a garage above 60°F with a cracked door and bring the piece inside to cure after 24 hours. And check your glue. If the bottle spent a night in a car below freezing, it may have lost strength permanently, even if it looks normal after thawing. When in doubt, buy a fresh quart for the winter; it’s cheaper than a failed glue line on a cutting board that goes through a dishwasher.