What's inside
As an Amazon Associate I earn from qualifying purchases. This post may contain affiliate links at no extra cost to you.
A wooden boot scraper is a useful cold-weather project that can be built from ordinary lumber and repaired instead of discarded. The design below uses a wooden frame, coarse replaceable slats, and an open bottom so mud and snow fall through. It is suitable for a confident beginner: the cuts are simple, but accurate spacing and weather protection matter.
Contents
What You’re Building
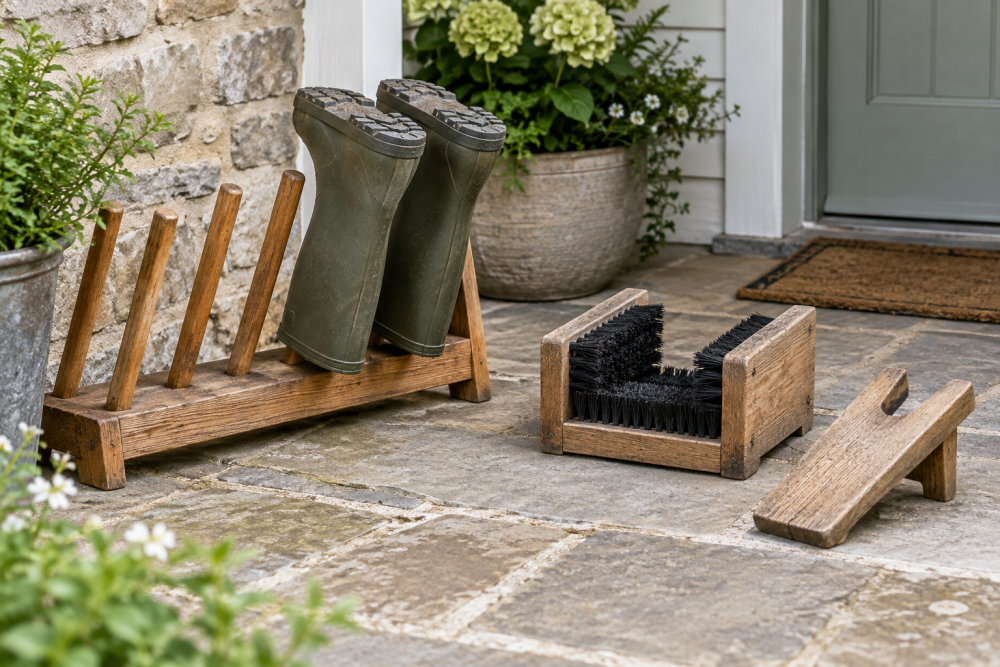
The scraper is a low rectangular box measuring about 18 inches long, 10 inches wide, and 5 inches high. Four fixed scraper slats run across the width. Each slat has a narrow gap below it, allowing the sole and sides of a boot to be dragged against the edge. The slats are held with screws from the outside, so a worn piece can be removed without taking apart the frame.
This size works for most adult boots while remaining stable on a porch. If you regularly wear large work boots, increase the length to 22 inches. Avoid making the unit much narrower than 9 inches; a narrow scraper is easier to tip when you twist a boot sideways.
Materials and Tools
Use rot-resistant wood if the scraper will live outdoors. Cedar is light and easy to work, while pressure-treated pine costs less and tolerates wet ground better. Untreated pine is acceptable for a covered porch, but expect it to soften or split sooner.
- One 1-by-10 board, 18 inches long, for the base
- Two 1-by-4 side pieces, 18 inches long
- Two 1-by-4 end pieces, 8 1/2 inches long
- Four scraper slats, 1 by 2 inches by 10 inches
- Exterior-rated screws, 1 1/4 and 2 inches long
- Exterior wood glue, optional
- Drill, countersink bit, saw, tape measure, square, and 80-grit sandpaper
For the slats, buy a straight, dry board rather than using badly cupped offcuts. A cedar 1-by-2 board is a good choice when low weight and easy cutting matter. Pressure-treated material is the cheaper practical option for an uncovered entryway, although it is usually wetter and more prone to movement when first purchased.
| Material | Advantages | Drawbacks | Best use |
|---|---|---|---|
| Cedar | Light, rot-resistant, easy to cut | Soft; edges wear faster | Covered porch and easy maintenance |
| Pressure-treated pine | Inexpensive and durable outdoors | Heavy, wet, and can split | Exposed weather |
| Exterior plywood | Stable and widely available | Edges need thorough sealing | Base or sides, not ideal for scraper edges |
Cut and Prepare the Parts
Cut the base to 18 by 10 inches. Cut the side pieces to 18 inches and the end pieces to 8 1/2 inches. The shorter end pieces fit between the sides, producing an outside width close to 10 inches when using nominal 1-inch lumber, which is actually about 3/4 inch thick.
Cut four slats to 10 inches. Test-fit them between the side pieces before drilling. Lumber dimensions vary, and trimming a slat by 1/8 inch is easier than forcing the frame out of square.
Break every sharp edge with sandpaper, especially the top edges of the slats. Do not round the working edge heavily; a slightly crisp edge scrapes mud better. Inspect for knots near screw locations. A screw driven through a knot can split a narrow slat.
Assemble the Frame
Set the base on a flat surface. Position the side pieces along the long edges and the end pieces between them. Check both diagonals before fastening; if they match within about 1/8 inch, the frame is square.
Drill two clearance holes through each side into the ends, then drive 2-inch exterior screws. Use a box of exterior wood screws with corrosion-resistant coating. Stainless screws cost more but are worthwhile near salt, coastal air, or frequently wet concrete. For a sheltered porch, coated exterior screws are normally sufficient.
Attach the frame to the base with 1 1/4-inch screws from underneath. Predrill every hole, particularly in cedar or pressure-treated lumber. Drive screws flush, not deep enough to create pockets that hold water.
Install the Replaceable Slats
Mark the inside faces of both side pieces for four slats. Place the first slat about 1 1/2 inches from one end, then leave approximately 1 inch between slats. The exact spacing is not critical, but gaps below 3/4 inch tend to clog with mud and leaves.
Position each slat with its top edge about 1 1/2 inches above the base. This gap lets a boot sole pass under the scraper edge while keeping the frame rigid. Clamp the slat in place, drill one pilot hole near each end, and fasten it with 1 1/4-inch screws through the side pieces.
Use one screw at each end rather than glue. Glue makes replacement difficult and often fails first because the assembly stays wet. If a slat twists, remove it and replace it rather than forcing it flat; a bowed scraper catches boot heels and puts unnecessary stress on the frame.
Finish and Weatherproof the Scraper
Sand the complete assembly with 80-grit paper, then remove dust. Apply two coats of exterior penetrating oil or porch-and-deck finish, allowing the first coat to soak in fully. A penetrating exterior wood finish is easier to renew than paint and will not hide cracks as readily.
Seal end grain carefully, especially on the four slats. End grain absorbs water quickly and is usually where rot begins. Let the finish cure according to its label before placing the scraper outside. Do not use the scraper while the coating is tacky; grit and mud will stick permanently.
Placement and Maintenance
Set the scraper on a firm, level surface near the entrance, not on loose gravel. Add four rubber feet or small paving blocks if the base sits directly on wet concrete. A set of outdoor rubber feet reduces sliding and keeps the bottom ventilated.
After heavy use, shake out the unit or rinse it with a hose and stand it on edge to dry. In autumn, remove leaves from the gaps before they stay wet against the wood. Inspect the slats at the start of each winter. Replace any piece with deep grooves, soft spots, or a split extending from a screw hole.
Replacement takes only a drill and a matching 10-inch slat. If the side holes become loose, shift the new slat 1/2 inch along the frame or plug the old holes with exterior wood filler before redrilling. With this arrangement, the part that receives the most abuse is inexpensive and replaceable, while the main frame can last for many seasons.