What's inside
As an Amazon Associate I earn from qualifying purchases. This post may contain affiliate links at no extra cost to you.
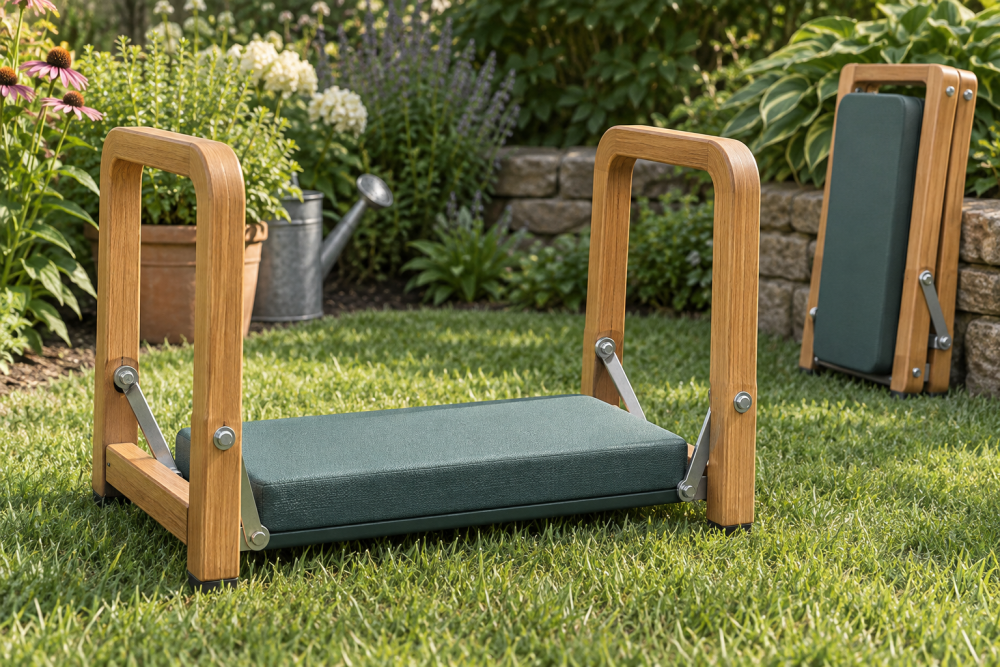
A wooden garden kneeler is a useful first woodworking project because the parts are simple, the dimensions are forgiving, and mistakes usually stay visible rather than dangerous. This version works as both a kneeling pad and a low garden seat. Its legs fold underneath for storage, while a thick top gives you a stable place to work around raised beds and borders.
The finished kneeler is about 20 inches long, 11 inches wide, and 9 inches high when open. Those dimensions suit most adults, but you can shorten or lengthen the legs to fit your height. Use straight, sound lumber and take time fitting the hinges; a loose folding joint is the main failure point on this project.
Contents
Materials and Tools
You will need one 1-by-12 board, preferably pine, cedar, or another outdoor-rated wood. The nominal board is usually about 3/4 inch thick and 11 1/4 inches wide. Buy a piece at least 24 inches long. You will also need two leg boards, each 18 inches long by 3 1/2 inches wide, four exterior-rated butt hinges, exterior screws, wood glue, sandpaper, and an outdoor finish.
For comfort, add a removable kneeling cushion or a piece of closed-cell foam. A cushion is preferable to permanently gluing foam to the wood because it can be removed to dry after wet weather.
Useful tools include a tape measure, pencil, square, handsaw or circular saw, drill, drill bits, screwdriver or driver, clamps, and a sanding block. A box of exterior wood screws is more useful than drywall screws, which rust and can snap in outdoor lumber.
| Material choice | Advantages | Trade-offs |
|---|---|---|
| Pine | Cheapest, easy to cut, widely available | dents easily and needs careful sealing |
| Cedar | Light, naturally rot resistant | More expensive and softer around screw holes |
| Pressure-treated wood | Good moisture resistance | Heavier, often wet, and harder to finish cleanly |
Cut List and Layout
Cut the following pieces:
- One seat board: 20 inches long by approximately 11 1/4 inches wide
- Two folding legs: 18 inches long by 3 1/2 inches wide
- Optional two leg braces: 9 inches long by 1 1/2 inches wide
Round over or heavily sand the four corners of the seat. A 1-inch radius is enough. Sharp corners catch clothing and are uncomfortable when the kneeler is carried. On each leg, mark a line 2 inches from both ends. These marks help you position the hinges consistently.
Before cutting, check your board for splits, loose knots, and cupping. A slight crown is acceptable, but do not use a board that rocks badly on a flat surface. The top should be flat enough that your weight is spread across it.
Build the Seat and Legs
Sand the seat and legs with 80- or 100-grit paper, then finish with 120 grit. Sanding before assembly is easier than trying to reach every edge around the hinges. Break every sharp edge with a few passes of sandpaper.
Lay the seat upside down on a flat work surface. Position one leg along each long side, with the leg boards running front to back underneath the seat. Leave approximately 1/2 inch between each leg and the seat’s outside edge. The legs should fold inward toward the center, not outward beyond the seat.
Attach two hinges to each leg. Place one hinge about 2 inches from the front end and the other about 2 inches from the rear end. Keep the hinge barrels aligned along the same side of the leg. Mark the holes, drill pilot holes, and drive the screws by hand or at low speed. Pilot holes are particularly important near the ends of pine or cedar because splitting here can make a hinge useless.
Use screws short enough that they cannot come through the top. For 3/4-inch stock, 1/2-inch or 5/8-inch screws are generally appropriate, depending on the hinge thickness. Test-fold each leg before installing the remaining screws. If a hinge binds, loosen the screws slightly and realign it rather than forcing the leg.
Add Leg Stops and Braces
Folding legs need a positive stop. Without one, the legs can spread too far and collapse when you sit down. The simplest solution is to install a 9-inch brace across the inside of each leg near the lower end. Use one brace per leg, or add a second brace if the wood feels flexible.
Position each brace so the leg opens to roughly 9 inches high. Clamp it in place, set the kneeler upright, and test it with your hands before sitting on it. Adjust the brace position until both legs contact the ground evenly. A brace that sits too low makes the kneeler tall and unstable; one that sits too high may let the legs spread too far.
For a stronger stop, use a short length of hardwood screwed between the two legs when they are open. This is more rigid but makes the folded package slightly thicker. Avoid relying on a loose chain or cord as the only stop. Those can work, but they allow movement and are harder for a beginner to set accurately.
Test and Finish
Open the legs and place the kneeler on a hard, level floor. Press down on each corner of the seat. It should not rock, twist, or shift. Next, load it gradually with your hands, then sit on it carefully. If the legs move, stop and correct the hinge alignment or strengthen the stops. Do not assume outdoor soil will hide a structural problem; soft ground makes an unstable stool less predictable.
Ease any remaining edges with 120-grit sandpaper. Apply two or three thin coats of exterior paint, spar varnish, or penetrating outdoor oil. Coat the end grain especially well, since it absorbs water quickly. Let each coat dry fully before folding the legs. A finish made for exterior wood furniture is worth using; indoor polyurethane is not a reliable substitute.
For the simplest low-cost build, pine and paint are fine. Spend more on cedar only if you expect to leave the kneeler outdoors or want a lighter tool. If comfort matters more than appearance, a waterproof garden kneeling pad gives a bigger improvement than upgrading to expensive lumber.
Use and Maintenance
Wipe off soil before folding the legs, and store the kneeler under cover when possible. Check the hinge screws at the start of each gardening season. Tighten loose screws, but replace any that spin in damaged wood with slightly longer screws or machine screws with washers and nuts.
Do not stand on the kneeler, use it on steep ground, or carry it with the legs partly open. If a leg develops a split, remove it from service until it is replaced. The project is inexpensive to repair, and a five-minute inspection is better than discovering a failed hinge while kneeling over a bed of plants.