What's inside
As an Amazon Associate I earn from qualifying purchases. This post may contain affiliate links at no extra cost to you.
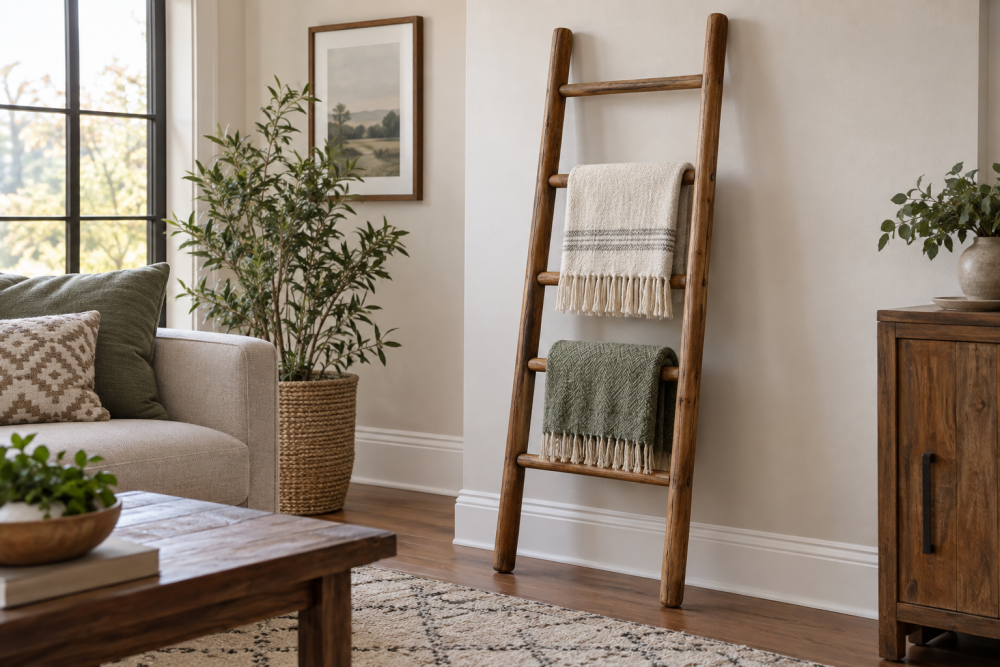
A wooden blanket ladder is a useful beginner-to-intermediate project: it takes little lumber, needs no complicated joinery, and can be finished in a weekend. This version uses two angled side rails and round rungs installed at alternating offsets. The offset makes the ladder look less like a straight utility rack and gives bulky blankets more room to hang without stacking directly on top of one another.
Contents
Project overview
The finished ladder is about 60 inches tall, 18 inches wide at the top, and 22 inches wide at the bottom. It has five round rungs. The rails lean against the wall, while each rung alternates slightly toward the front or back of the ladder. That small change is practical, not just decorative: blankets are less likely to slide into one dense pile.
| Part | Recommended material | Finished size |
|---|---|---|
| Side rails | 1×4 pine, poplar, or hardwood | 2 pieces, 60 inches long |
| Round rungs | 1-1/4-inch hardwood dowel | 5 pieces, 16 inches long |
| Fasteners | 2-1/2-inch screws or dowel joinery | 10 total, if using screws |
For the least expensive build, common pine and a straight-grained round dowel are fine. Choose poplar or maple if you want cleaner edges and a harder surface. A 1-1/4-inch hardwood dowel costs more than a softwood closet rod but is less likely to dent under heavy quilts.
Tools and materials
You will need a tape measure, pencil, combination square, drill, 1-1/4-inch spade or Forstner bit, countersink bit, clamps, sandpaper, wood glue, and a saw. A miter saw makes the angled cuts easy, but a circular saw or handsaw also works. Use a 1-1/4-inch Forstner bit if you want clean, flat-bottomed holes. A spade bit is cheaper and works, but it can tear out the back of the rail unless you back the cut with scrap wood.
Buy boards longer than the final dimensions if possible. Inspect each rail for bowing by sighting down its edge. A slight bow can be positioned inward, but a badly twisted board will make the ladder rock and cause uneven rung depths.
Cut and mark the rails
Cut both rails to 60 inches. Mark the rung centers at 8, 19, 30, 41, and 52 inches from the bottom of each rail. This gives approximately 11 inches between rungs, enough for folded throws and most standard blankets.
Lay the rails side by side with their bottom ends aligned. Transfer the marks across both boards using a square. Mark the left rail for front-offset holes at the first, third, and fifth rung positions. Mark the right rail for front-offset holes at the second and fourth positions. The remaining holes are back-offset. In practice, this means the rung ends alternate between two hole depths or two slightly shifted centerlines.
For a simple visual offset, shift each alternate hole 3/4 inch toward the outside face of the rail. Do not move holes so far that the dowel has less than 1/2 inch of wood surrounding it. Keep every hole centered left to right across the rail; only the front-to-back position changes.
Drill the rung holes
Clamp a scrap board tightly behind each rail before drilling. Set a depth stop, or wrap tape around the bit, so the holes are about 5/8 inch deep. Drill perpendicular to the broad face of the rail. A drill press gives the most consistent results, but a hand drill works if you use a square as a visual guide.
Dry-fit one rung in a pair of holes before drilling all ten. The dowel should enter firmly but not require hammering. If it is loose, glue will help, but a visibly sloppy joint will still leave the ladder weak. If it is too tight, sand the dowel lightly rather than enlarging the holes repeatedly.
Assemble the ladder
Cut five rungs to 16 inches and sand their ends. Test-assemble the rails and rungs on a flat floor. Check that the ladder sits evenly and that the alternating offsets are visible from the front. Number the rungs and holes if the fit is tight; this prevents mixing parts during glue-up.
Apply wood glue inside each hole and to the last 1/2 inch of each rung end. Insert the rungs, then clamp across the rails. Measure diagonally from the top of one rail to the bottom of the other, then reverse the measurement. Adjust the assembly until the two diagonal measurements are within 1/8 inch. Wipe away squeeze-out with a damp cloth.
For extra insurance, drive one 2-1/2-inch screw through the outside of each rail into every rung. Drill pilot holes first and countersink them. Screws are appropriate for a quick painted project, while glued dowel joints look cleaner under stain. Do not rely on screws alone in end grain; they can loosen as the wood moves.
Finish and wall safety
Sand the rails and rungs through 120 and 180 grit. Round the exposed rail corners with a sanding block. For a painted ladder, use primer followed by two thin coats of interior trim paint. For a natural finish, apply two or three coats of wipe-on polyurethane, sanding lightly between coats. A water-based polyurethane wood finish dries faster and stays clearer; oil-based finish gives pine a warmer color but takes longer to dry and smells stronger.
Let the finish cure fully before hanging textiles. Lean the ladder against a wall with its feet about 6 inches out from the baseboard. Stick felt pads or rubber furniture grippers under the feet. If children, pets, or heavy quilts will use it, anchor the top rail to a wall stud with a small angle bracket or furniture anti-tip strap. The ladder is decorative storage, not a climbing device.
Common mistakes and fixes
The most common failure is drilling holes at inconsistent angles, which makes the rails spread or twist during assembly. Use a drill guide or drill press if your first test hole wanders. Another problem is placing the ladder too close to the wall; blankets then compress against the paint and the feet can slide. Keep the lower end several inches forward.
If the cheaper pine option is straight and dry, it is perfectly adequate for light throws and seasonal display. Spend more on hardwood when the ladder will carry dense wool blankets, receive frequent handling, or remain unfinished. A final coat of clear finish and a wall anchor usually improve durability more than upgrading from pine to premium lumber.