What's inside
As an Amazon Associate I earn from qualifying purchases. This post may contain affiliate links at no extra cost to you.
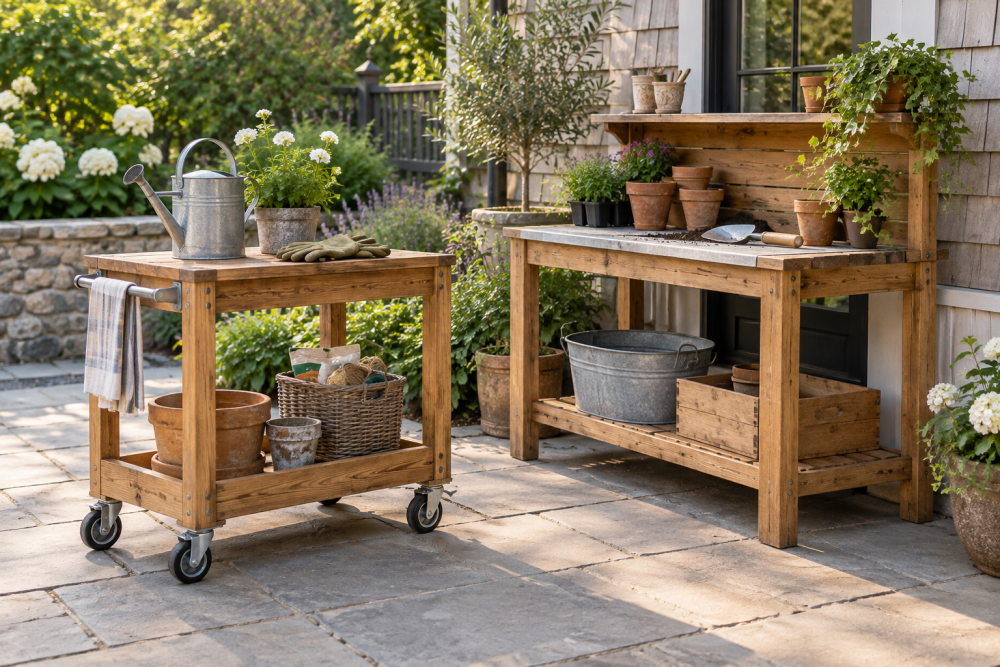
A kitchen cart with locking casters gives you extra counter space when you need it and gets out of the way when you don’t. It’s an intermediate beginner project: all straight cuts and simple joinery, but it has to be square, level, and strong enough to handle 100+ pounds of rolling load. Plan for a full weekend if you’re finishing with polyurethane or hardwax oil, or one long day if you use pre-finished parts.
Contents
Planning and Dimensions
The most useful cart size for a standard kitchen is 36 inches high (counter height), 24 inches deep, and 30 to 36 inches wide. That lets you roll it against a wall or island without blocking traffic. If you’re taller than 6’1″ or shorter than 5’4″, adjust the height by 1-2 inches to match your main counters so you can use it for real prep work.
Design around your top. A 1-1/2 inch thick butcher block top looks best and won’t flex. A 3/4 inch plywood top with hardwood edge-banding is lighter and cheaper, but you’ll need a center stretcher underneath to keep it flat if the cart is over 30 inches wide. Don’t try to build a 1-1/2 inch top by gluing two sheets of 3/4 inch plywood – the internal stresses often cause a slight bow once you cut it to size.
For the base, use hardwood for the legs (hard maple, beech, or white oak hold screws and take abuse) and use plywood or hardwood for the lower shelf. Softwood like pine works but dents easily and will loosen around caster screws after a year of rolling over tile grout lines.
Materials and Hardware
For a 36″W x 24″D x 36″H cart, you will need:
Top: one 38″ x 26″ x 1-1/2″ butcher block panel or one sheet of 3/4″ Baltic birch plywood (you’ll use about half a sheet). Four legs: 1-1/2″ x 1-1/2″ x 35″ hardwood. Aprons and shelf frame: 3/4″ x 3-1/2″ hardwood or plywood. Lower shelf: 3/4″ plywood. Hardware: four 3-inch locking casters rated for at least 75 lbs each, 1-1/4″ pocket screws, wood glue, and four 5/16″ x 1″ T-nuts or threaded inserts for the casters.
Don’t mount casters with just wood screws into end grain or plywood edge. They will pull out. Use a threaded insert and bolt system or a 3/4″ plywood caster mounting block glued and screwed inside each leg corner. If you use pine legs, inserts are mandatory – screws into softwood end grain have less than half the pull-out strength.
Finish matters in a kitchen. Use a food-safe hardwax oil or 3 coats of water-based polyurethane on all sides, including the bottom of the shelf and top. Unfinished wood on the underside will absorb mopping water and swell.
Choosing the Right Locking Casters
Casters are where cheap carts fail. The two numbers that matter are wheel diameter and locking type.
For kitchen use, 3-inch wheels are the sweet spot. 2-inch wheels look discreet but jam on grout lines, thresholds, and crumbs. 4-inch wheels roll smoother but raise the cart to 37 inches and look oversized on a 24-inch deep base.
Get casters that lock both wheel rotation and swivel. A wheel-only brake still lets the cart drift and spin when you lean on it to knead dough. Look for a dual-locking lever – press down with your foot to lock, flip up to release.
| Caster Type | Best For | Pros | Cons |
|---|---|---|---|
| 3″ Dual-Locking Rubber Wheel | Most home kitchens (tile, wood, LVP) | Quiet, non-marking, locks wheel + swivel | Costs $8-12 per caster |
| 3″ Plastic / Hard Nylon Wheel | Budget build on smooth floors | Cheap ($4-6 per caster), rolls easily | Noisy, can mark hardwood, wheel brake only on many models |
| 3″ Polyurethane on Steel | Heavy loads, garage/kitchen hybrid | High capacity (120+ lbs each), smooth roll | Heavier, more expensive, overkill under 150 lbs total |
If your budget is tight, a set of 3 inch dual locking rubber casters at around $30-35 for four is worth the upgrade over the $16 hard plastic sets. The cheaper option is fine for a light microwave cart that rarely moves, but not for a prep cart you actually push and lean on.
Tools Needed
You can build this with a circular saw and drill, but a miter saw and pocket hole jig make it much faster and more square. You’ll need a drill/driver, tape measure, square, clamps (at least four 24-inch clamps), and a sander. A brad nailer helps hold parts while glue sets but isn’t required.
If you don’t own a jig for strong hidden joints, a pocket hole jig kit will handle all the apron-to-leg and shelf-frame joints without mortise and tenon work. For cutting the butcher block, a sharp 40-tooth carbide blade leaves a much cleaner edge than the stock 24-tooth framing blade that comes with most circular saws.
Step-by-Step Build
1. Cut all parts to length first, then dry-fit. Cut the four legs to 34-1/2″ if you’re using 3″ casters to hit 36″ finished height plus a 1-1/2″ top. Check that all four legs are identical within 1/32 inch – any difference will make the cart rock even after the casters are on.
2. Build two end frames. Attach the short aprons (21″ long for a 24″ deep cart) between the legs with two pocket screws per joint plus glue. Keep the top apron flush with the top of the legs so the top sits flat. Set the lower apron 4 inches up from the bottom to leave clearance for the caster mounting blocks.
3. Connect the end frames with the long aprons (33″ long for a 36″ wide cart). This is where you need to check for square – measure diagonals across the top opening. If they differ by more than 1/16 inch, rack the frame until they match before the glue sets. An out-of-square base will bind the lower shelf and make the cart crab sideways when you roll it.
4. Install the lower shelf frame and caster blocks. Add a 3/4″ x 3″ stretcher front-to-back in the center if your lower shelf is plywood wider than 30 inches. Glue and screw 4″ x 4″ x 3/4″ plywood blocks inside each leg corner at the bottom. Drill for threaded inserts. Let the glue cure before you load the inserts – spinning an insert in wet glue ruins the hold.
5. Attach the shelf. Drop in a 3/4″ plywood panel cut 1/8 inch undersize for wood movement. Don’t glue the panel solid on all four sides if it’s solid wood – use slotted screw holes or figure-8 fasteners. Plywood can be glued and brad-nailed.
6. Mount the top. Center the butcher block with 3/4 inch overhang on three sides and flush on the back if it will sit against a wall. Attach from below with figure-8 fasteners or Z-clips in grooves cut in the aprons, not with screws straight up through the apron. The top needs to expand and contract seasonally – with rigid screws it will crack.
7. Install casters. Thread the insert, add a washer, and bolt the caster plate tight. Put the two locking casters on the same side so you can lock both with one foot movement against a wall. Test on your actual kitchen floor with 50 pounds on top – if it drifts with brakes locked, your floor isn’t level and you need dual-locking casters, not wheel-only brakes.
Finishing and Common Mistakes
Sand to 150 grit before assembly and to 180-220 grit after. Break all sharp edges with a 1/8 inch roundover or hand sanding – sharp plywood edges chip and hurt when you bump them in a tight kitchen. Apply finish before mounting casters so you don’t gum up the bearings.
The three failures we see most often: First, wobbly cart due to legs cut slightly different lengths. Fix: cut legs together, ganged and clamped. Second, top warps because it was screwed down tight. Fix: use floating fasteners. Third, casters rip out because they were screwed into pine end grain with 3/4 inch screws. Fix: use inserts and 5/16 inch bolts, and never mount a caster closer than 3/4 inch from the edge of the leg.
If you want a ready-made top to save time, a prefinished hardwood butcher block countertop 36 inch saves you gluing up and flattening, and it’s usually flatter than what you can get from big-box store lumber. It costs more than plywood, but you skip hours of sanding and edge-banding.
Total cost is typically $120-180 with a plywood top and $220-320 with a hardwood butcher block top, not counting finish and casters. Build time is 6-8 hours plus drying time. Done right, the cart will roll straight, lock solid for chopping, and handle daily kitchen use for years.