What's inside
As an Amazon Associate I earn from qualifying purchases. This post may contain affiliate links at no extra cost to you.
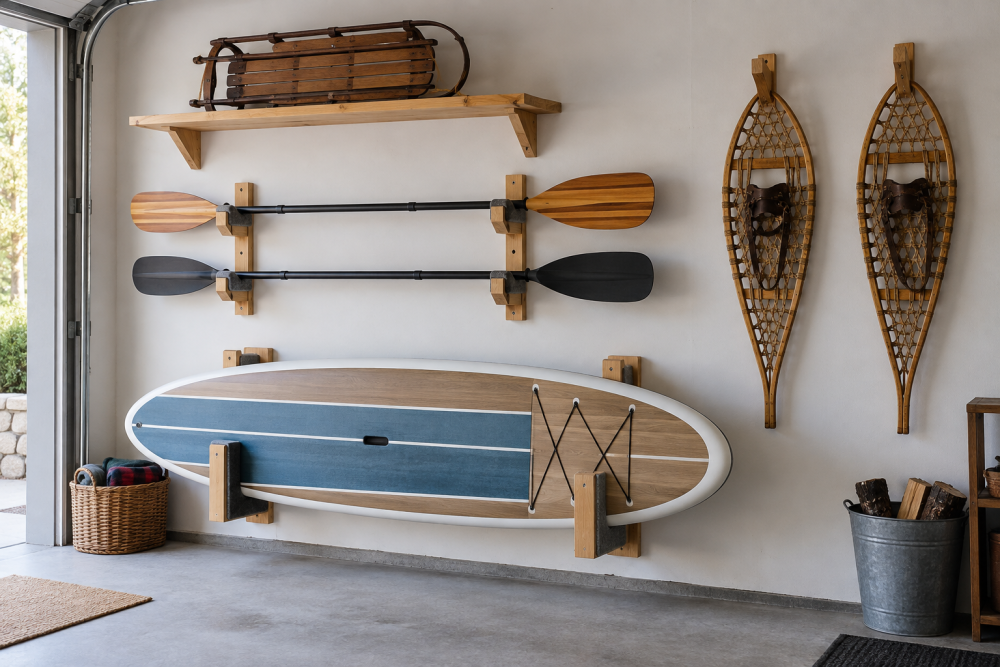
A wall rack keeps a paddleboard off the garage floor and out of the way, but it has to support the board without denting its rails or pulling out of the wall. This simple wooden design uses two padded arms attached to wall-mounted backers. It suits most hard boards and inflatable boards stored in their bags; measure your board before cutting because widths and thicknesses vary.
Contents
Size and capacity
This plan makes one rack for one board, with two arms spaced along its length. Each arm projects about 18 inches from the wall and holds the board horizontally on its side. For a typical board weighing 25–40 pounds, that gives a comfortable margin when the rack is securely fastened to studs. Do not use the rack for a person to climb on, or assume the same design is safe for several heavy boards stacked together.
Measure the board’s thickness at the point where it will sit, including any fins or accessories that will remain attached. Make each arm’s inside opening at least 2 inches wider than that measurement, and line the contact surfaces with padding. A 12-foot board can use arm centers roughly 6 feet apart; keep the supports well inside the board’s ends, rather than placing them at the tips.
Materials and tools
For one rack, gather two 2×4s, each about 24 inches long, for wall backers; two 2×4 arms, each about 18 inches long; and two triangular 2×4 braces. Cut the braces so each runs from near the outer end of an arm back to the backer, forming a rigid triangle. Use straight, dry lumber without large knots where screws or joints will go. Exterior-rated or ordinary construction lumber is adequate in a dry garage; plywood scraps can work for braces if they are at least ¾ inch thick and firmly fastened.
You will also need 3-inch structural screws for fastening the backers to studs, 2½-inch screws for the braces and arms, a drill, level, tape measure, stud finder, saw, and sandpaper. Choose closed-cell foam pipe insulation or dense rubber padding for the arm tops. Soft foam is cheap and easy to replace, but very squishy foam compresses unevenly and can let the board roll.
Choose a layout
| Option | Best for | Trade-off |
|---|---|---|
| Board on its side, two padded arms | One board and limited floor space | Needs careful spacing and a secure wall connection |
| Board flat on wide shelves | Boards with delicate rails or long-term storage | Projects farther into the garage and takes more lumber |
| Floor rack | Renters or walls without accessible studs | Uses floor space and needs a stable footprint |
The side-on design is compact, but it depends on padded, level supports and good wall anchoring. If the board manufacturer recommends storing the board flat, or the board has a fragile rail, use wide, fully padded shelves instead. Renters who cannot drill into studs should choose a freestanding rack rather than relying on drywall anchors.
Build the arms
Cut the two backers, arms, and braces to length. Sand sharp corners, especially on the arm ends, so they cannot snag a board bag. Hold each arm square to a backer and predrill before driving two 2½-inch screws through the backer into the arm. Add a diagonal brace underneath each arm; use two screws at each end. The brace should make a tight triangle with no visible gap. If the wood splits, stop, drill a pilot hole slightly narrower than the screw shank, and replace the damaged piece if the split runs through a joint.
Wrap the top of each arm with foam or rubber and secure it with adhesive or short staples that cannot protrude through the padding. Keep hard screw heads and sharp edges away from the board’s contact area. A scrap of carpet can work in a pinch, but it can hold grit and moisture; inspect it often and clean it before the grit scratches the finish.
Mount the rack to studs
Find two wall studs and mark their centers. Mount one backer at each stud location, with the supports spaced about 6 feet apart for a long board. Set the height so the board clears the floor and nearby vehicles or shelves; 4–5 feet is common, but account for lifting height and garage-door tracks. Use a level to keep the arms at the same height. Drive at least two 3-inch structural screws through each backer into the center of a stud. Do not substitute drywall screws, which are brittle and not designed for this load.
If the stud spacing does not match your desired support spacing, fasten a horizontal ledger board across at least two studs, then attach the backers to that ledger. A ledger spreads the load, but it must be secured to studs with structural screws—not just drywall. Avoid mounting into thin wall paneling unless you can verify solid framing behind it.
Test and load the rack
Before lifting the board, pull down firmly on each arm and check for movement, creaking, loose screws, or a backer lifting from the wall. Correct any movement before loading. With a second person helping, place the board gently on the padded arms and check that it rests evenly without rocking or pinching. A board that slides toward an edge needs wider arms, a small retaining lip, or repositioned supports. Any lip should be padded and low enough that it cannot press into the rail.
For a board stored in a bag, check that the bag does not bunch into a narrow pressure point. Keep the board away from heaters, direct sun through a window, and areas where tools or bicycles may strike it. Inspect the screws and padding at the start of each season; replace compressed, torn, or damp padding before it exposes the wood.
When to buy instead
Building is worthwhile if you already own basic tools and can anchor into studs. The lumber and fasteners are usually inexpensive, and the dimensions can match an unusually wide board. A ready-made rack may be the better choice if you need adjustable arms, have several boards, or cannot confidently locate framing. Compare a paddleboard wall rack by its stated load rating, arm depth, padding, and required wall fasteners—not just its price. If buying fasteners separately, use 3-inch structural wood screws for the stud connection and follow the manufacturer’s installation guidance.