What's inside
As an Amazon Associate I earn from qualifying purchases. This post may contain affiliate links at no extra cost to you.
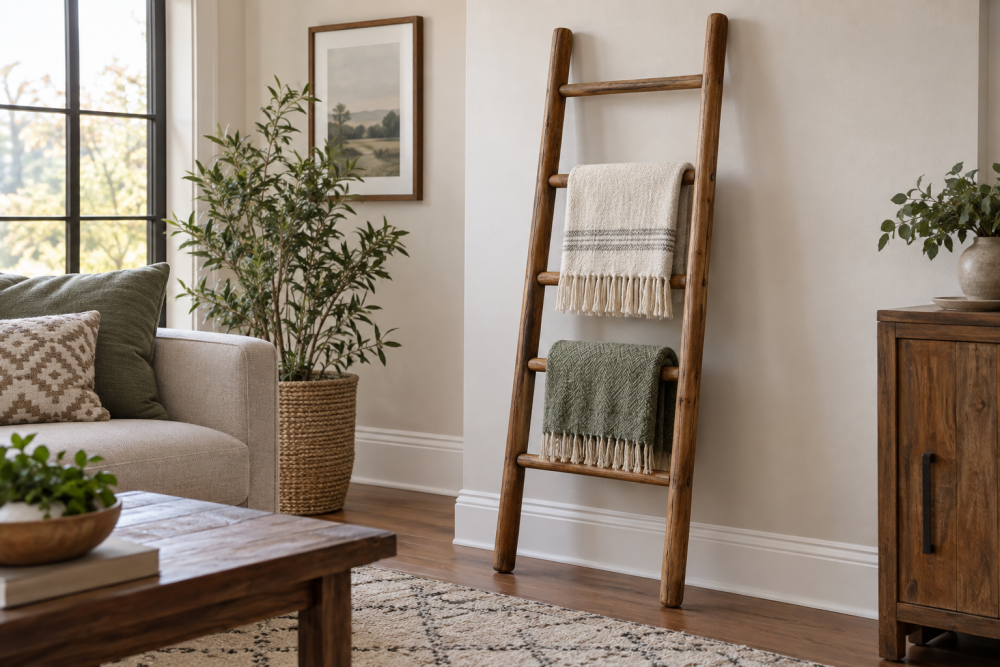
A through-mortised blanket ladder uses rails that pass through the sides of the stiles rather than ending at their surfaces. The exposed rail ends are part of the design, but the joints also demand accurate layout: a loose fit can rack, while an overly tight fit can split a stile during assembly. This plan is for a sturdy, freestanding ladder about 68 inches tall, with five rails and a slight backward lean.
Contents
Dimensions and layout
Use straight, dry hardwood for the stiles and rails. The dimensions below assume 1-inch-thick stock; actual thickness after planing may be closer to ¾ inch, so base mortise and tenon measurements on the stock you have, not its nominal size.
| Part | Finished size | Quantity |
|---|---|---|
| Stiles | 68 × 2¼ × 1 in. | 2 |
| Rails | 20½ × 1¾ × 1 in. | 5 |
| Rail spacing | 11 in. on center | 4 gaps |
| Exposed tenon ends | ⅜ in. beyond each stile | 10 |
Mark the first rail center 5½ inches from the bottom end of each stile, then mark the remaining centers at 11-inch intervals. Keep the marks square across both stiles, and label the inside faces so the mortises stay aligned. The ladder’s 20½-inch rails leave room for a small tenon at each end while producing an overall width of roughly 22¼ inches, including the exposed ends.
Materials and tools
Hard maple, ash, oak, or walnut will work. Ash and maple are practical choices when the ladder may get bumped; pine costs less and is easier to cut, but dents more readily and can split around a tight mortise. Avoid warped boards and knots near the joints. A moisture meter is useful when buying lumber for an indoor project; aim for stock near 6–10% moisture content.
You’ll need a saw, square, marking knife or sharp pencil, chisels, drill and bits, clamps, and a way to cut accurate tenons. A router with a straight bit and guide can speed repeated mortises, but careful chisel work is adequate for five joints. A set of bench chisels is more useful here than a large specialty kit; keep the cutting edges sharp.
Cut and mark the joints
Cut both stiles to equal length and check them against one another. Lay out mortises 1¾ inches high and 1 inch wide, centered on each rail mark. Because the rail tenons pass through the stile, the mortises go all the way through its 1-inch thickness. Knife the shoulders carefully; those lines define the visible joint.
Cut each rail to length, then mark a centered tenon at both ends. A useful starting size is 1 inch high, ⅜ inch long beyond the stile, and about ½ inch thick. That leaves roughly ¼ inch of shoulder above and below the tenon. The tenon should fit the mortise snugly without forcing the stiles apart. Cut it slightly oversize and pare to fit. Test on scrap of the same thickness before cutting all ten ends.
For mortises, drill a row of overlapping holes inside each knife line, stopping just short of the layout marks. Clean the waste with a sharp chisel, working from both faces toward the center to reduce breakout. A router and edge guide can produce consistent openings, but finish corners with a chisel and check each mortise with the actual tenon. Do not widen every hole to match the loosest one; adjust individual tenons instead.
Dry-fit and assembly
Fit all five rails between the stiles without glue. The shoulders should touch the stile faces, and the tenons should project evenly by ⅜ inch. If a rail twists the stiles or needs hammer blows to seat, pare the tenon cheeks. If it slides freely, the joint may rack; glue can help, but it cannot reliably rescue a badly loose through-joint.
Apply a thin coat of wood glue to the tenon cheeks and inside mortise walls, then assemble on a flat surface. Use clamps across the stiles, adding light pressure only until the shoulders close. Measure diagonally from opposite corners; adjust until both measurements match, ideally within ⅛ inch. Clean squeeze-out before it hardens. A loose tenon can be wedged from the exposed end, but wedges spread the tenon and may split the stile, so use thin, tapered wedges only when there is adequate material and a deliberate wedge layout.
Lean and stability
A blanket ladder is not a climbing ladder. For a freestanding version, give it a stable lower footprint and lean it against a wall so the top rests securely without sliding. A simple option is to bevel the stile bottoms to match the floor angle after positioning the ladder; test the cut on scrap or make a shallow adjustable foot instead. A wall-mounted ladder is less likely to tip, but it must be fastened into studs or suitable masonry anchors, not drywall alone.
These approaches have different trade-offs:
| Approach | Best for | Main drawback |
|---|---|---|
| Freestanding, beveled feet | Moving between rooms; no wall holes | Can slip or tip if the floor is slick |
| Wall-mounted | Homes with children or pets nearby | Requires secure fastening and a fixed location |
| Rubber pads at feet | Protecting finished floors | Do not replace a secure wall connection |
Sanding and finish
Ease sharp edges with a small round-over or a few passes of sandpaper. Sand from 120 through 180 grit; finer sanding can reduce stain absorption without improving a utility piece much. Apply a wipe-on oil or clear water-based finish in a ventilated area, following the label. A water-based polyurethane finish dries relatively clear, while oil finishes deepen the wood color and need more drying time. Let the coating cure fully before hanging blankets, which can stick to a fresh finish.
Before use, check every joint for movement and confirm that the ladder cannot slide under a light push. Recheck wall fasteners periodically if mounted. Keep the ladder for blankets and other light textiles; neither the through-mortises nor the rails are rated for body weight.