What's inside
As an Amazon Associate I earn from qualifying purchases. This post may contain affiliate links at no extra cost to you.
This lantern is sized for a small LED candle, not a live flame. Wood, glue, and finish can catch fire, and a vented roof does not make a wooden enclosure safe for a real candle. Use a battery-powered candle only, and keep the lantern out of rain.
Contents
Size, materials, and tools
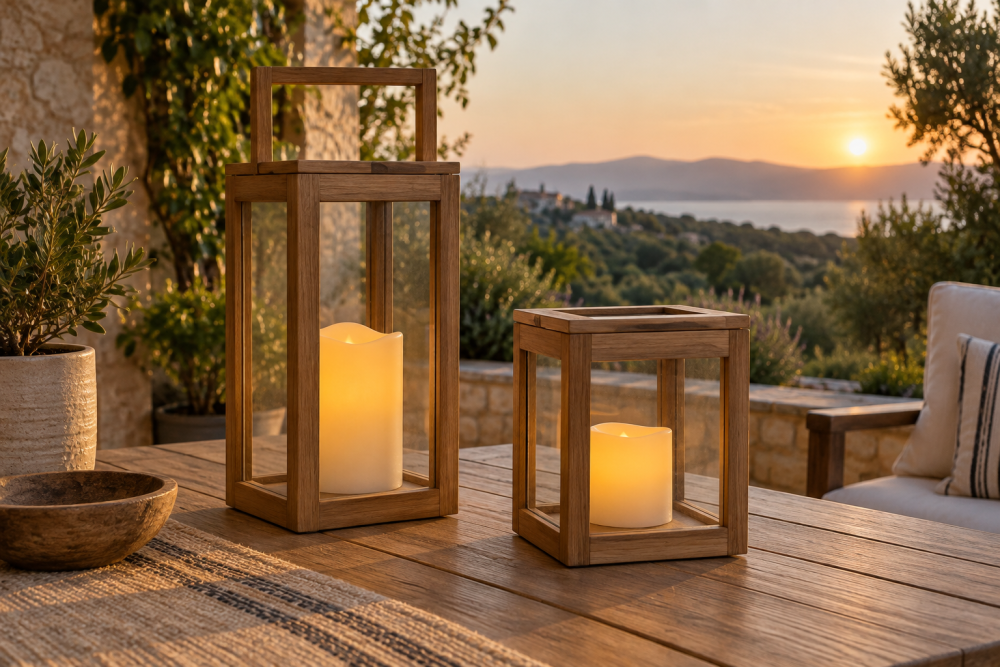
The finished lantern is about 6 inches wide, 6 inches deep, and 10 inches tall, including its roof. The body has four framed sides with clear plastic panels; the roof lifts off for access. These dimensions leave room for an LED candle about 2 inches wide and 4 inches tall. Measure your candle before cutting if it is larger.
Use straight, dry wood. Cedar resists occasional damp air but is soft and can split near narrow joints. Pine costs less and works well indoors. For a first build, 3/4-inch pine boards are an easy choice. You will also need 1/8-inch clear polycarbonate or acrylic for the panels, exterior wood glue, and small brad nails or screws. Polycarbonate is less likely to crack if struck; acrylic is often cheaper but can split when drilled near an edge.
Useful tools include a saw, drill, square, measuring tape, clamps, and sandpaper. A pair of small bar clamps helps hold the frame square while glue sets, but careful assembly on a flat surface can work without them. If you need to cut several matching frame pieces, a hand miter box and saw is a low-cost alternative to a powered saw.
Cut list
Cut the parts from 3/4-inch stock. The dimensions below assume the front and back pieces span the full 6-inch width, while the side pieces fit between them.
| Part | Quantity | Cut size |
|---|---|---|
| Bottom panel | 1 | 6 × 6 inches |
| Corner posts | 4 | 3/4 × 3/4 × 7 inches |
| Top and bottom rails | 8 | 3/4 × 3/4 inches; length varies by face |
| Roof pieces | 4 | 3/4 × 2 inches, cut to fit as a shallow pyramid |
For the rails, make each opening about 4 inches square. On the front and back, cut rails to 6 inches; on the two sides, cut them to 4 1/2 inches so they fit between the corner posts. The roof pieces are easiest to fit after the body is assembled: cut four panels or boards to cover the body, with each edge meeting at the peak. Exact angles depend on the roof height, so test with scrap before cutting finished pieces.
Assemble the body
Make four rectangular frames by joining two vertical rails between two horizontal rails. Each frame should have an opening near 4 inches square. Check each frame for square by measuring both diagonals; they should match within 1/16 inch. Glue the joints, then secure them with brads or small screws. Drill pilot holes for screws to reduce splitting, especially near the ends of the rails.
Attach the frames to the corner posts, keeping the bottom edges flush with the underside of the posts. Work on a flat surface and check that the body is square before the glue cures. Add the 6-inch square bottom panel underneath. If the lantern will sit on a shelf, a solid bottom keeps the LED candle centered; for easier cleaning, use four narrow cleats instead and leave the center open.
Fit the clear panels
Measure each opening after assembly. Cut the plastic panels about 1/8 inch smaller in both directions than the opening, so seasonal movement and small measuring errors do not force them out of place. Sand the wood first, then capture each panel with thin glazing strips or small retaining tabs. Do not glue acrylic rigidly on all four edges; it can crack as the frame moves. Leave a little clearance, and avoid placing fasteners closer than 1/2 inch to a panel edge.
Clear panels protect the candle from dust and help the lantern look brighter, but they show fingerprints. Frosted plastic softens the LED glow and hides smudges, though it reduces brightness. Either is suitable for a decorative LED lantern.
Make the vented roof
Build a removable roof so you can reach the candle without adding a door. A simple square cap with four sloped sides works: make a 6-inch square base frame, then fit four roof boards from its edges up to a small flat ridge cap. Keep the ridge cap about 1 1/2 inches square. Leave a 1/4-inch gap between the sloped boards near the ridge, hidden beneath the cap, for airflow. The opening should not be so wide that the roof looks unfinished or lets debris fall directly inside.
Fasten the roof boards to the base frame with glue and brads, but do not glue the roof to the lantern body. Add two small stop blocks underneath the roof frame so it sits centered and cannot slide off easily. Sand the edges and check that the cap lifts freely. If it binds, trim the stops rather than forcing the roof down, which can split the rails.
Finish and use safely
Ease sharp corners with 120-grit sandpaper, then finish with 180 grit. For indoor use, a water-based clear finish keeps the color light and dries quickly. If the lantern will be used on a covered porch, use an exterior-rated finish and inspect it each season. Finish can slow moisture uptake, but it will not make the lantern weatherproof; prolonged rain can swell joints and haze plastic panels.
Set the LED candle on the bottom panel and confirm that the roof lifts off without snagging. Avoid real candles, even in a glass cup: heat can damage plastic panels, ignite dust, or char wood around the roof. A battery candle with a timer is convenient, while a basic switch-operated candle is cheaper and works just as well if you do not mind turning it on by hand.