
What's inside
As an Amazon Associate I earn from qualifying purchases. This post may contain affiliate links at no extra cost to you.
A handmade wooden box has small surfaces, close-fitting parts, and edges that are easy to soften with excessive sanding. The finish needs to protect the wood without making the lid stick, hiding the grain, or leaving a plastic-looking film. Shellac and hard-wax oil can both work well, but they behave very differently.
For most indoor boxes, shellac is the better choice when you want a crisp, traditional finish and quick recoating. Hard-wax oil is easier to apply without drips and gives a natural, low-build surface, but it costs more and usually needs longer drying time. The best option depends on the wood, the box’s intended use, and how much repairability matters to you.
As an Amazon Associate we earn from qualifying purchases at no extra cost to you.


Contents
Shellac and hard-wax oil compared
| Characteristic | Shellac | Hard-wax oil |
|---|---|---|
| Appearance | Clear to amber, with adjustable gloss | Natural, usually satin or matte |
| Drying time | Often touch-dry in 15–30 minutes | Usually 8–24 hours between coats |
| Application | Brush, pad, or spray | Thin coat wiped on and buffed off |
| Water resistance | Fair, but not ideal for standing water | Good for normal indoor spills once cured |
| Spot repairs | Excellent; fresh shellac melts into old shellac | Good, but may require cleaning and blending |
| Cost | Usually lower | Usually higher |
When shellac is the better choice
Choose shellac for a jewelry box, keepsake box, document box, or other project where the finish itself is part of the traditional look. It emphasizes figure without making the surface look heavily coated. Amber or “orange” shellac adds warmth to pale woods; dewaxed clear shellac keeps the color change smaller.
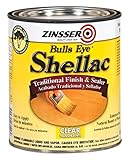
Shellac is also useful when you need to finish a project in one day. A thin coat can dry in roughly 20 minutes under normal conditions, and you can often apply three or four coats in an afternoon. A small box may need only 2 to 4 fluid ounces of mixed finish, depending on the number of coats and the wood’s porosity. Store-bought dewaxed shellac finish is a practical choice if you plan to put another finish over it.
The main weakness is moisture and alcohol resistance. A wet glass, damp hand, or spilled alcoholic drink can leave a mark. Shellac can also soften in a hot car or near a heat source. That does not make it unsuitable for a box, but it makes it a poor choice for a container that will live in a kitchen, bathroom, or frequently handled workshop.
When hard-wax oil is the better choice
Hard-wax oil is a good fit for a box that will be handled often or exposed to occasional spills. It soaks into the wood and leaves a thin cured layer of oil and wax rather than a visibly built-up film. The result usually feels smooth and close to the wood, with less glare than high-gloss shellac.
It is particularly forgiving on open-grained woods such as oak, ash, and walnut. You apply a very thin coat, allow it to penetrate, then remove every trace of wet excess. The common failure is not applying too little; it is leaving too much. Thick patches can remain soft, turn glossy in spots, attract dust, and stay tacky for days.
A quality hard-wax oil wood finish costs more per container than shellac, but a small box uses surprisingly little. Follow the label’s coverage rate rather than guessing. For a box with roughly 5 square feet of exterior surface, a thin two-coat application may use only a few tablespoons.
Prepare the box before finishing
Finish cannot correct poor joinery or sanding scratches. Sand the parts before final assembly where access will be limited, working through 120, 150, and 180 grit. Stop at 180 or 220 grit for most species. Sanding much finer can burnish dense wood and reduce absorption, especially with hard-wax oil.
Break sharp outside edges with one or two light passes of 180-grit paper. Do not heavily round the lid, rim, or finger joints unless that is part of the design. Vacuum the box, then wipe it with a clean, dry cloth. Avoid soaking the wood with water immediately before finishing; raised grain can make the lid fit differently.
Test the finish on an offcut from the box. This shows the final color, sheen, and whether the lid or tray parts become tighter after finishing. Finish mating surfaces sparingly. A heavy coat inside a rabbet can reduce clearance enough to make a previously smooth lid bind.
How to apply shellac
Use a fresh premixed product or mix shellac flakes with alcohol according to the manufacturer’s instructions. For a small box, a 1-pound cut is easy to control. Brush on a thin, even coat with a good natural-bristle or shellac-rated synthetic brush. Work quickly and avoid repeatedly brushing areas that have begun to dry.
After the first coat dries, lightly sand with 320 or 400 grit paper, using just enough pressure to remove raised fibers. Remove the dust and apply two or three more thin coats. If you want a hand-rubbed sheen, level the cured surface with 600 grit or a fine abrasive pad, then apply a small amount of paste wax. Do not wax if you plan to apply hard-wax oil or another finish afterward.
Shellac’s fast drying is convenient, but it also magnifies mistakes. Runs, lap marks, and cloudy spots usually come from applying too much or working in a cold, humid room. Keep the finish around 65–75°F and avoid drafts carrying dust onto the wet surface.
How to apply hard-wax oil
Stir the product thoroughly without whipping air into it. Apply a very thin coat with a lint-free cloth, white nonwoven pad, or the applicator specified on the label. After 5–15 minutes, or at the label’s stated time, wipe off all visible wetness. The surface should look evenly damp, not glossy and wet.
Allow the first coat to cure for the recommended period, commonly overnight. Lightly scuff only if the manufacturer calls for it, then apply a second thin coat. Give the box at least several days before heavy use. Even when it feels dry, the finish may still be curing.
Keep oil-soaked rags spread flat outdoors until completely dry, or place them in a water-filled metal container and dispose of them according to local rules. Never leave crumpled oil rags in a pile; they can generate enough heat to ignite.
Which finish should you buy?
Buy shellac if the box is decorative, you want a faster project, or you expect to repair scratches over time. It is the cheaper option and is entirely adequate for a bedroom or office keepsake box. Choose hard-wax oil if the box will see frequent handling, you prefer a matte natural feel, or better everyday spill resistance matters more than rapid drying.
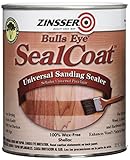
For an uncertain project, use dewaxed shellac as a sealer only when you need to lock down a resinous or blotchy surface, then follow with a compatible topcoat after testing. Otherwise, choose one system and apply it thinly. Most finishing failures on small boxes come from excess product, insufficient drying time, or finishing the mating parts too heavily—not from choosing the less expensive finish.