What's inside
As an Amazon Associate I earn from qualifying purchases. This post may contain affiliate links at no extra cost to you.
Contents
What This Project Is (and Isn’t)
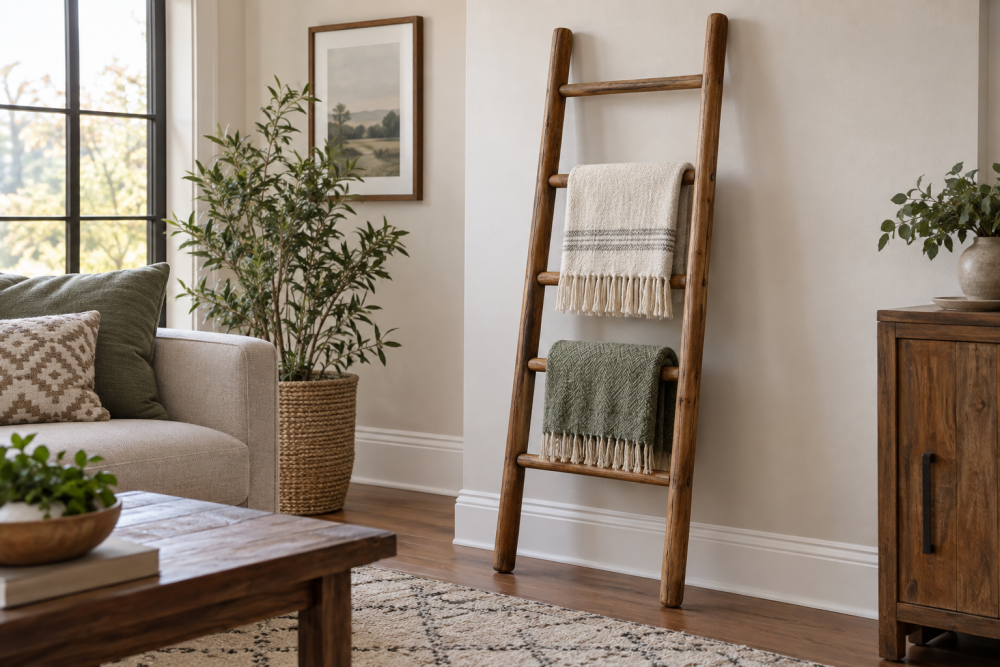
A wooden kitchen storage ladder is a lean-to ladder with 4 to 5 rungs that rests against the wall at about 10-15 degrees. You hang pans, towels, baskets, and utensils from S-hooks or cup hooks on the rungs. It is not a step ladder – do not climb it – and it is not a wall-mounted pot rack. It holds 30-40 pounds total if built correctly, which is enough for 5-6 cast iron skillets or a mix of lighter items. Build time is about 3-4 hours plus finish drying time. Skill level is beginner to intermediate: you need accurate drilling and sanding, but no complex joinery.
Tools and Materials You’ll Need
For the frame, use two rails 72 inches long from 1×3 or 1×4 hardwood, and four rungs 18-20 inches long from 1-1/4 inch diameter hardwood dowel or 1×2 stock. You will also need wood glue, 2-1/2 inch wood screws or 3/8 inch dowel pins, and 8-10 screw-in cup hooks or removable S-hooks. For hardware, add felt or rubber pads for the feet and wall contact points to prevent sliding and wall scuffs.
Tool list is short: a cordless drill driver with Forstner or spade bits, a saw (miter saw or hand saw), tape measure, square, clamps, 120 and 180 grit sandpaper, and a level. A drill press helps keep rung holes perfectly perpendicular, but you can get clean results with a drill guide jig. If you use dowel rungs, a 1-1/4 inch Forstner bit gives a cleaner, flatter-bottomed hole than a spade bit, with less tear-out.
Choosing Wood: Cost vs. Durability
Kitchens see steam, grease, and temperature swings. Softwoods dent easily and can sag under load over time. Hardwoods cost more but stay straight and hold screws and hooks far better. Do not use construction-grade spruce 2x4s – they are too heavy, will warp, and look chunky against kitchen cabinets.
| Wood Species | Cost (approx. per board foot) | Pros | Cons | Best For |
|---|---|---|---|---|
| Poplar | $4 – $6 | Stable, paints well, easy to drill | Soft for a hardwood, dents if you drop pans on it | Painted ladders on a budget |
| White Oak | $9 – $13 | Very strong, water-resistant, holds screws well | Heavy, harder to drill, needs sharp bits | Natural or oiled finish, heavy loads |
| Hard Maple | $8 – $11 | Extremely hard, clean look, resists wear | Can burn when sawing, glue needs good surface prep | Modern kitchen, lighter color |
| Cherry | $10 – $14 | Beautiful aging, stable, moderate weight | Expensive, darkens unevenly if finish is inconsistent | Statement piece if you want it to match cabinets |
If you are keeping costs down, poplar is fine and honestly the smart choice if you plan to paint. If you want a clear natural finish that will take daily use for years, white oak is worth the premium. Avoid red oak for this – its open grain absorbs kitchen grease and is harder to clean.
Cut List and Layout
For a standard 72-inch tall ladder that leans against an 8-foot wall:
Rails: 2 pieces at 72″ x 2-1/2″ x 3/4″ (from 1×3). Rungs: 4 pieces at 18″ long x 1-1/4″ diameter dowel, or 18″ x 1-1/2″ x 3/4″ if using flat rungs. Spacing: Mark rung centers at 12″, 28″, 44″, and 60″ from the bottom. This leaves a 12-inch clearance at the top and bottom and keeps the center of gravity low. Overall width at the rungs is 18 inches; total width including rails is about 19-1/2 inches.
Dry-fit everything before drilling. Lay the rails parallel on sawhorses, use spacers to keep them exactly 18 inches apart on center, and mark rung positions with a square across both rails at once. This prevents a common failure where rungs are slightly out of parallel and the ladder rocks or binds.
Step-by-Step Build
1. Cut and sand rails and rungs to length. Sand all parts to 180 grit before assembly; it is much harder to sand around dowels later. Round over the front edges of the rails slightly with sandpaper to make it comfortable to handle.
2. Drill rung holes. For dowel rungs, drill 3/4 inch deep, 1-1/4 inch diameter holes centered on the inside face of each rail. Use tape on the bit as a depth stop. If you do not have a drill press, clamp a scrap board behind the rail to prevent blowout and keep the bit vertical. For flat rungs, skip the Forstner holes and plan to attach rungs with glue and two countersunk screws per joint.
3. Test fit dowels. They should seat firmly with hand pressure, not fall in loosely. If too tight, sand the dowel ends; if too loose, you will need to rely more on glue and pins to prevent wobble. Apply wood glue in the holes and on dowel ends, tap together with a mallet, and clamp across the width. Check for square by measuring diagonals – both should be equal.
4. Reinforce. Glue alone will eventually loosen in a kitchen where the ladder gets bumped. For dowel rungs, drill a 3/16 inch pilot hole through the back of the rail into the dowel and drive a 2-inch screw, or glue in a 3/8 inch dowel pin. For flat rungs, use two 2-1/2 inch screws per joint, pre-drilled and countersunk, with the heads filled later if you are painting.
5. Add feet and wall bumpers. Cut the bottom of the rails at a 10-12 degree angle so the feet sit flat when leaning. Glue on 1/4 inch rubber pads. At the top back of each rail, add a felt pad where it touches the wall. Without these, the ladder will slide on tile or hardwood and will mark paint.
Adding Hanging Hooks Without Weakening the Rungs
Do not overload a single rung. Spread weight evenly. A 1-1/4 inch dowel spanning 18 inches will support about 15-20 pounds in the center before it starts to flex noticeably. S-hooks that loop over the rung are stronger than screw-in hooks because they do not remove wood, and you can slide them to balance loads.
If you prefer fixed hooks, use screw-in screw-in cup hooks or drop-in utility hooks rated for at least 10 pounds each. Drill a pilot hole first – 3/32 inch for hardwood, 7/64 inch for softwood – or you will split the dowel. Place hooks no closer than 2 inches from the rail and at least 3 inches apart to avoid creating a line of weak points. For flat rungs, screw hooks into the bottom face, not the edge, and do not use hooks longer than 1-1/4 inch thread length or they will poke through.
A common failure mode is screwing hooks into end grain or into a knot. Both will pull out under a heavy pan. If a rung has a visible knot where you planned a hook, move the hook 2 inches to clear wood.
Finishing for a Kitchen Environment
Unfinished wood will absorb oil and water, swell, and get sticky near a stove. You need a hard, wipeable finish. For a natural look, 2-3 coats of water-based polyurethane (satin) holds up best to grease and steam and does not yellow like oil-based poly. For a painted ladder, prime with shellac-based primer first to seal knots, then two coats of semi-gloss acrylic enamel for washability.
Do not use straight mineral oil or beeswax alone – it looks nice for a week but offers almost no protection from splatter and needs constant re-oiling. If you want an oiled look, use a hardwax oil or Danish oil labeled for kitchen use, then top with one coat of poly on the rungs where hooks will abrade the surface.
Apply finish before installing hooks. Sand lightly with 220 grit between coats. Let the final coat cure 48-72 hours before loading the ladder; poly feels dry in hours but reaches full hardness in days, and putting cast iron on too early will leave dents. If you want extra durability, look for a water based polyurethane with a kitchen or floor rating.
Placement and Safety
Lean the ladder at a shallow angle where the feet are about 12-14 inches out from the wall. This is stable without being in the walkway. Never anchor the top to the wall rigidly – you want it to be removable for cleaning. Instead, add a small L-shaped wall cleat or two discreet hooks on the wall that capture the top rail and prevent sideways slip while still letting you lift the ladder away.
Keep it away from direct heat and open flame. Hang hot pads or towels on the lower rungs, pans and heavier items in the middle where the ladder is most stable, and light baskets or herbs on top. Check hooks monthly; screw-in hooks loosen with vibration and need a quarter-turn retighten. If the floor is uneven tile, shim under the rubber pad with a vinyl furniture shim rather than letting the ladder rock – rocking works joints loose fast.
With this build, you get a piece that adds vertical storage without drilling a heavy pot rack into ceiling joists, and you can move it when you rearrange. If you build with poplar and S-hooks, total cost is about $45-$65. In oak with premium hooks and poly, expect $95-$130, but it will outlast the cheaper version by years in daily use.