What's inside
As an Amazon Associate I earn from qualifying purchases. This post may contain affiliate links at no extra cost to you.
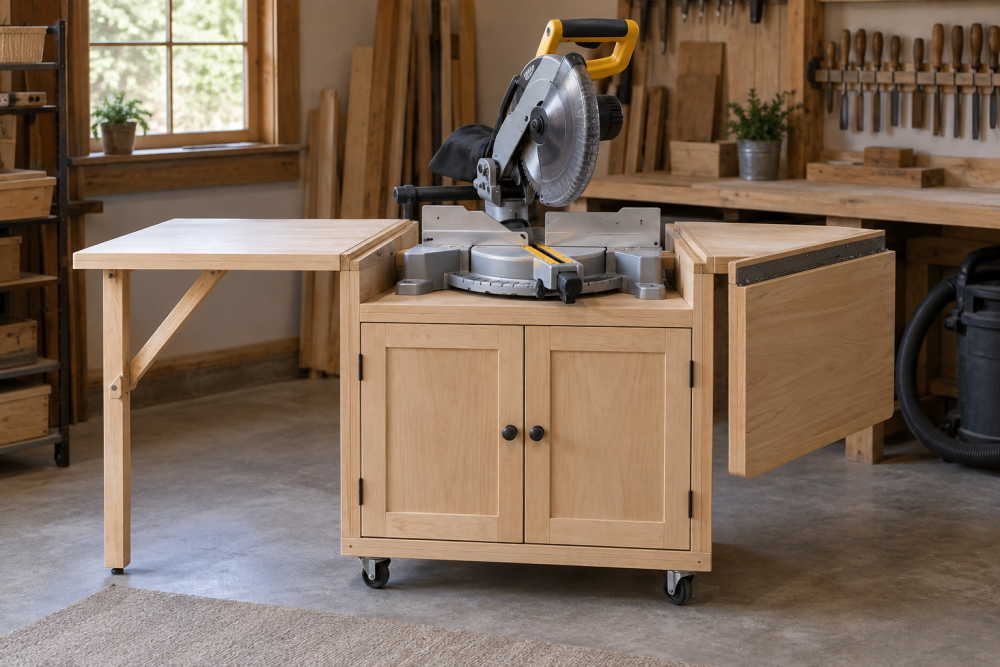
A compact miter saw station can give you stable support for long boards without taking over the whole shop. This design uses a fixed center deck and two hinged wings that fold down when the saw is not in use. It suits a small garage or shed and can be built with basic sheet goods and construction lumber.
Dimensions and layout
The example station is 60 inches wide, 24 inches deep, and about 36 inches high. Adjust the width to suit your space and the saw’s footprint. The key measurement is the saw table: with the saw sitting on the center deck, its table should be level with the support surfaces on both wings. Measure your saw before cutting; saw tables vary, and a few millimeters of mismatch can let long stock tip or bind.
Make the center deck wide enough for the saw base and any sliding-rail travel. A 24-inch-deep deck works for many compact and mid-size saws, but check the manufacturer’s clearance requirements. Leave room behind the saw if its rails move backward. Do not place the station hard against a wall until you have tested a full slide and bevel cut.
Materials and tools
Use ¾-inch plywood for the top and wings, 2-by-4 lumber for the frame and legs, and a pair of continuous hinges or several sturdy butt hinges for each wing. You will also need screws, washers, glue, and a straightedge. For the wings, use plywood with sound edges; a warped panel makes it harder to align the support surface.
A basic circular saw guide rail can help make accurate plywood cuts, though a table saw is convenient if you already own one. A continuous hinge spreads load along the wing edge and is forgiving of imperfect screw placement. Separate hinges cost less and are fine when the wing is well supported by a cleat or folding leg.
| Support option | Best for | Trade-off |
|---|---|---|
| Continuous hinge with folding leg | Wide wings and frequent use | More hardware and setup; the leg must land on a flat floor |
| Three butt hinges with folding brace | Lower-cost builds | Hinges need careful alignment; a weak brace can sag |
| Fixed wings | Stations that stay assembled | Simple and rigid, but use more storage space |
Build the base
Cut the plywood center deck to roughly 24 by 24 inches, then build a square 2-by-4 frame beneath it. Add crosspieces so the deck cannot flex under the saw. Make four legs from 2-by-4s and connect them with lower stretchers on all sides. A stretcher about 6 inches above the floor leaves room to sweep underneath while keeping the base from racking.
Assemble the frame on a flat surface and check it for square before tightening the screws. If the floor is uneven, use adjustable feet or shim the legs; a station that rocks will transmit vibration and can shift during a cut. Fasten the deck to the frame with screws, then place the saw on top and mark its base holes. Bolt the saw down with washers and nuts where possible. If you use screws into the deck, confirm they do not protrude through the plywood.
Fit the flip-up wings
Cut two wings to match the center deck depth and the space available on each side. Wings 18 to 24 inches wide support common trim and framing stock; wider panels need stronger braces or legs. Put the station on a level floor, set the saw table to the desired height, and use a straightedge across the saw table to mark the wing height.
Attach each hinge so the wing folds down without hitting the frame or floor. Add a folding leg, locking brace, or sturdy support cleat under each wing. Do not rely on the hinge alone to carry a long board. With the wings raised, place a straightedge across the saw table and both supports. Shim the hinge or support until the surfaces are flush. Test with a long, straight board: it should lie flat without rocking, and the cut-off end should not drop as it separates.
Test and improve
Raise and lower each wing several times, then apply moderate downward pressure near its outer edge. If it sags, reinforce the support before cutting. A wing that moves while cutting can pull stock out of square or pinch the blade. Check that the saw’s full range of motion clears the wings, braces, and any fence you add.
A stop block makes repeated cuts easier, but it must not trap the offcut against the blade. Set the stop on a straight fence attached to the wings, and leave the cut-off side free to move. For dust control, a shop vacuum connected to the saw is a practical first step; many saws still scatter fine dust, so wear eye and hearing protection and use a suitable respirator when cutting indoors.
If you need a fence, screw a straight board to the back of the center deck and continue it onto the wings only after confirming the surfaces align. A separate fence on each wing is easier to adjust, but even a small offset can twist long stock. For occasional DIY use, a straight, replaceable fence made from inexpensive lumber is adequate. Spend more on hinges or braces only if the wings will be raised often or will support heavy material.
Before the first project, make a test cut in scrap and check it with a square. Recheck the wing height after the station has been moved; a leg can settle or land on debris. Fold the wings down when the station is stored, and keep the saw unplugged while adjusting hinges, braces, or the fence.