What's inside
As an Amazon Associate I earn from qualifying purchases. This post may contain affiliate links at no extra cost to you.
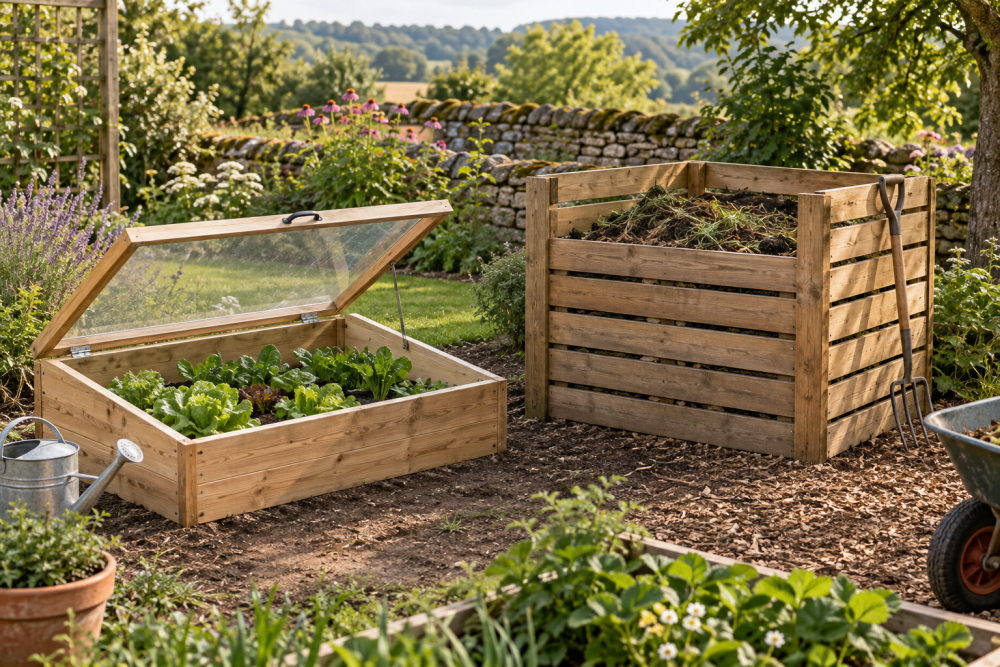
A simple leaf bin keeps fall cleanup contained without buying a bulky plastic enclosure. This design uses four corner posts and fence boards to make a ventilated square about 3 feet wide and 3 feet deep. It stands roughly 3 feet tall, holds a useful pile of leaves, and can be opened from the front for loading or emptying.
Contents
Plan the bin and choose materials
Use four 36-inch corner posts and fence boards about 5½ inches wide. The plan assumes ¾-inch-thick boards and posts with two flat faces wide enough to fasten boards on adjacent sides. A 4-by-4 post works, though its rounded or chamfered corners can make board contact uneven; a square 3-by-3 or 4-by-4 post gives a cleaner joint.
Pressure-treated lumber lasts longer where posts touch damp soil, but it costs more and is heavier to work with. For a seasonal bin on a dry, level spot, untreated cedar or ordinary fence boards are adequate. Untreated boards will weather and may need replacement after several seasons. Avoid boards with deep splits or loose knots near screw locations.
| Option | Best for | Trade-off |
|---|---|---|
| Untreated fence boards | Low-cost seasonal use | Can rot or warp sooner when left on wet ground |
| Cedar boards | Longer outdoor life without heavy lumber | Costs more; still benefits from good drainage |
| Pressure-treated posts | Ground contact and damp sites | Heavier and more expensive; use gloves and follow the label |
For this build, gather four posts, about 24 boards, 2½-inch exterior-rated screws, a drill, tape measure, square, saw, and safety glasses. A box of exterior deck screws is preferable to drywall screws, which can corrode outdoors or snap under movement. If your boards are wider or you want more airflow, you may need fewer; count the courses before cutting.
Prepare the site and cut parts
Choose a spot with room to work around the bin, preferably on firm, well-drained ground. A low, wet corner can keep leaves soggy and speed up decay. Clear a 3-foot-square area and level it roughly. For a more stable base, set the posts on flat pavers rather than burying them; this also makes the bin easier to move or repair.
Cut the four posts to 36 inches. Cut 24 boards to 36 inches for a straightforward layout with each board spanning between the posts. Check each cut for square. If your boards are already close to 36 inches, use their actual length consistently rather than forcing a nominal measurement.
One board may not span both post faces if the posts are unusually wide or the boards are short. In that case, shorten the bin to fit the boards, or use longer boards and trim them to a common length. Do not leave a board barely catching the post: screws close to an end are more likely to split it.
Assemble the sides
Lay two posts parallel on a flat surface, with their outside faces 36 inches apart. Place the first board across them near the bottom, leaving about 2 inches of clearance from the ground. Drive two screws into each end, keeping them at least ¾ inch from board edges. Pre-drill near board ends, especially with dry cedar or brittle fence boards; skipping this step is a common cause of splits.
Add five more boards up the posts, leaving a gap of roughly 1 inch between courses. Use a short scrap as a spacer so the openings stay consistent. The gaps allow air through the pile, helping leaves dry instead of compacting into a wet mat. Repeat to make a second identical side.
Stand the two sides upright about 36 inches apart. Connect them with boards on one side, again leaving about 1-inch gaps. Check that the frame is square by measuring diagonally from corner to corner; adjust until the two diagonal measurements are close. Add the remaining boards to the fourth side, but leave a front opening if you want easier loading and unloading.
Choose a fixed or removable front
A fully boarded bin is stiffer and better for holding a large pile, but emptying it means lifting leaves over the wall or removing screws. A partial front is easier to use with a rake or wheelbarrow but can bow if the pile presses against it.
| Front style | Advantages | Limitations |
|---|---|---|
| Fixed boards, full height | Strong and simple | Harder to unload; less convenient for turning leaves |
| Open lower section | Easy access with a rake or shovel | Leaves may spill out if pushed against the opening |
| Removable lower boards | Access when needed, closed during filling | Requires careful fitting and can loosen with repeated handling |
For a removable front, install short cleats inside the front posts to make vertical guide slots, or use simple screw-on stops that hold loose boards in place. Leave enough clearance for boards to slide without binding after they swell. A small assortment of exterior wood screws can help if your cleats need shorter fasteners than the frame.
Check the frame and put it to work
Before filling the bin, push gently on each side. If it racks or wobbles, check that the corner screws are tight and add one diagonal brace across the back using a spare board. A brace is a useful fix on uneven ground, but it makes that side harder to access. If posts split, remove the affected fasteners and shift them at least 1 inch from the split; adding more screws into the same damaged area rarely holds.
Keep leaves loose rather than stomping them down. A bin filled tightly with dry leaves can settle into a dense, slow-to-break-down mass. Mix in a little moisture and occasional green material if you are composting, and turn the pile when practical. If the bin is only for collection, leave enough headroom to rake leaves in without spilling them over the top.
Inspect the lower boards each fall. Replace any that feel soft, check for protruding screw points, and clear packed leaves from the gaps. If the ground stays wet, lift the bin onto pavers or move it to a better-drained location. That small adjustment often extends the life of inexpensive fence lumber more effectively than adding a finish.