
What's inside
As an Amazon Associate I earn from qualifying purchases. This post may contain affiliate links at no extra cost to you.
A router is easiest to learn on when the project has broad, stable stock, a small number of cuts, and room for a test pass. Start with straight edges and shallow profiles before trying raised panels, tight curves, or joinery that has to fit precisely. These projects build control without asking a beginner to risk an expensive board or a complicated assembly.
As an Amazon Associate we earn from qualifying purchases at no extra cost to you.



Contents
Choose a router you can control
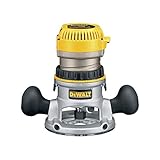
A compact fixed-base router is enough for edge profiles, shallow grooves, and roundovers on small projects. A plunge base is useful when a cut must start inside a board, such as a stopped groove, but it adds weight and another control to learn. If you expect to do both kinds of work, a compact router kit with fixed and plunge bases can cover more tasks. A basic single-base router is fine if your first projects are all edge work.
Check the collet size before buying bits: many compact routers use 1/4-inch shanks, while larger routers may accept 1/2-inch shanks as well. Match the bit to the collet; never force a shank that does not fit. For these projects, a straight bit and a small roundover bit are a sensible start. A small 1/4-inch straight-and-roundover bit set is usually more useful than a large assortment of specialty profiles.
Clamp the work securely, keep both hands on the router, and wear eye and hearing protection. Feed the router against the bit’s rotation: on a typical handheld router, move left to right along the near edge of a board. Take light passes rather than removing the full depth at once. Practice on scrap from the same stock, because grain direction and wood hardness affect the cut.
Good first router projects
| Project | Router skill | Why it works for beginners | Common mistake |
|---|---|---|---|
| Roundover coasters | Edge profiling | Small stock and short cuts make it easy to practice | Routing loose or undersized pieces |
| Serving board | Edge profiling and template work | One broad board gives room to guide the router | Trying to route end grain in one heavy pass |
| Picture frame | Rabbets and accurate sizing | Introduces a useful recess for glass and backing | Cutting all four pieces before checking fit |
| Small shelf | Straight grooves | Teaches repeatable layout and guided cuts | Routing without a fence or clamped guide |
1. Roundover coasters
Cut four to six square blanks about 4 inches across and 3/8 to 1/2 inch thick. Hardwood scraps such as maple or cherry hold up well, but clear pine is cheaper and adequate for practice. Sand the faces first, then clamp each blank in a larger carrier board or use a router table. Do not hold a small coaster in one hand while routing it; the bit can catch and pull it away.
Fit a small roundover bit and make a test cut on scrap. Set the depth so the bearing follows the edge without cutting a sharp step. Route all four edges with a light pass, then inspect for tear-out before taking another pass. Round the corners by hand with sandpaper rather than trying to steer the router around them. This project teaches steady travel and shows how end grain may need a slower feed or a very shallow cleanup pass.
2. Simple serving board
Use a flat board roughly 8 by 14 inches and 3/4 inch thick. A straight-sided board is easier than a shaped one: cut the outline with a jigsaw, smooth it with a sanding block, then use a roundover bit on the perimeter. For a more controlled edge, clamp the board to the bench and work in sections, keeping the router base flat. Make two shallow passes if the profile is larger than a small roundover.
For a handle slot, use a template and a plunge router only if you are comfortable with the setup; otherwise, leave the handle out. A loose template or a deep plunge can leave a ragged slot or cause the router to jump. Use food-safe finishing products after sanding, and avoid decorative grooves that collect food unless you are prepared to clean them carefully.
3. Basic picture frame
A frame introduces a rabbet: a ledge cut along the back to hold glazing, a picture, and backing. Start with four straight, square pieces at least 2 inches wide. Clamp a straightedge parallel to the edge and use a straight bit to cut a rabbet about 1/4 inch wide and 3/8 inch deep, adjusting to the thickness of the materials you will fit. Make several shallow passes and test the fit with scraps of glass or acrylic and backing material.
Cut the frame miters only after routing the rabbet, then assemble with a strap clamp or carefully placed clamps. A common failure is cutting the rails too short because the inside opening was measured without accounting for the rabbet or picture size. Make one test corner first. A router table can make repeated rabbets easier, but a clamped guide works for a single frame; the table is not a necessary first purchase.
4. Small shelf with a groove
Build a simple shelf from two side panels and one shelf board. A shallow groove, or dado, in each side supports the shelf. Mark matching lines about 1/4 inch deep, then clamp a straight guide so the router cuts the same distance from each reference edge. Use a straight bit whose width is close to the shelf thickness, or make multiple passes to widen the groove. Test the fit on offcuts before cutting the actual sides.
If the groove is too tight, pare or sand the shelf edge gradually; if it is too loose, the joint may rack under load. A router edge guide is convenient for repeatable cuts, while a clamped straightedge costs less and is perfectly serviceable for occasional work. A router edge guide or straightedge clamps helps keep the cut consistent, but careful layout matters more than buying an elaborate jig.
Practice before cutting the project
Make three test cuts on scrap: a shallow roundover, a straight groove, and a second pass deepening that groove. Check for burn marks, chatter, and splintering. Burns usually mean the bit is lingering or the feed is too slow; chatter can point to a loose setup or an overly deep cut. Tear-out is more likely where the bit exits across end grain, so reduce the depth and support the edge with scrap when possible.
Unplug the router before changing bits, and confirm the bit is seated securely without bottoming out in the collet. Keep the cord clear of the cut, wait for the bit to stop before setting the tool down, and avoid routing stock with nails, loose knots, or movement in the clamps. These habits matter more than a larger motor or a drawer full of bits. Start with one project, keep the offcuts, and use them to tune the next cut.