
What's inside
As an Amazon Associate I earn from qualifying purchases. This post may contain affiliate links at no extra cost to you.
Cold weather is a good reason to move small joinery projects indoors. A box, stool, or wall shelf can teach the same marking and fitting skills as larger furniture without needing long boards or a heated workshop. The best practice projects have repeatable joints, forgiving dimensions, and parts small enough to glue up on a bench.
As an Amazon Associate we earn from qualifying purchases at no extra cost to you.


Contents
Choose a project that fits your space
Before cutting, check the indoor setup. You need a stable bench or work surface, room to clamp the assembly, and ventilation suitable for your finishes and adhesives. Avoid running a table saw in a living space: fine dust and noise travel, and a shop vacuum does not make the setup safe by itself. For apartment work, hand tools and pre-cut stock are often the practical choice.
Use dry, straight stock. A board that twists after you cut it can turn a clean joint into a gap, and winter heating can make poorly dried wood move further. For small projects, buying surfaced boards reduces milling work; a selection of hardwood project boards is convenient, but inspect each piece for bow, checks, and knots near the joints. Pine is inexpensive and easy to cut, though soft edges bruise readily and tear out more easily than poplar or maple.
Compare four winter projects
| Project | Joinery practice | Typical stock | Difficulty |
|---|---|---|---|
| Small lidded box | Finger joints or miters | 1/2-inch boards | Beginner to intermediate |
| Step stool | Mortise and tenon | 3/4- to 1-inch boards | Intermediate |
| Wall shelf | Dovetail or housed joints | 3/4-inch boards | Beginner to intermediate |
| Small frame | Bridle joints | 3/4-inch square stock | Intermediate |
Dimensions are starting points, not fixed plans. Adjust them to your stock and intended use, but keep mating parts the same thickness and mark them as a set.
Build a lidded box for accurate corners
A box about 6 by 4 by 3 inches is a useful first joinery exercise. Cut four sides from 1/2-inch stock and make finger joints at the corners. The repeated pins and sockets expose errors quickly: if the spacing drifts, the last finger will not fit. Cut one side first, then use it to transfer the layout to its mate rather than measuring every finger separately.
Test each corner before glue. A joint should slide together with light hand pressure; pounding a tight joint can split a thin wall. If it is loose, do not rely on extra glue to fill a visible gap. Make a new test cut, or adjust the remaining pieces to match. Dry-fit the full box with a square, then glue and clamp it without bowing the sides. A plywood bottom set into a shallow groove is more stable than a solid panel across the grain.
If finger joints are beyond your tools, make simple butt joints with a plywood bottom and focus on square assembly. That is a cheaper, perfectly reasonable route for a storage box, but it teaches less about fitting corner joinery. A set of small woodworking clamps helps hold the sides, though a flat bench and careful clamp placement matter more than buying a large assortment.
Practice mortise and tenon on a stool
A low stool is a stronger test because its joints carry a person’s weight. Keep it modest—roughly 12 inches high with a seat around 12 inches square—and use straight, sound stock. Cut a mortise-and-tenon joint in scrap of the same thickness before working on the legs. A mortise should be centered and consistent; an off-center socket leaves a thin wall that can split under load.
For hand work, drill out most of the waste with a bit slightly narrower than the mortise, then pare to the layout lines with a sharp chisel. Saw the tenon cheeks just outside the line and fit gradually. A tenon that is too tight can push a leg apart during glue-up; one that is loose may rack even if the glue looks neat. Assemble the base dry, check that it sits without rocking, and only then glue it. Do not use an indoor practice stool until the joints are sound and the assembly has been checked for wobble and load stability.
Make a shelf or frame when space is tight
A short wall shelf uses less floor space and can teach a housed joint: cut a shallow dado across the supports so the shelf sits in a socket rather than relying only on screws. A 1/4-inch-deep dado in 3/4-inch stock is a workable starting point. Keep it square to the edge; a sloping cut makes the shelf sit crooked. For a light-duty shelf, screws and glue are simpler and often adequate, but a housed joint gives better resistance to the shelf rotating under load.
A small frame is another compact option. Bridle joints are easy to inspect because the open notches show whether the shoulders meet. They are less forgiving than they look: cut the slots too wide and the frame can rack. Leave the pieces a little long, dry-fit, then trim the final length after the corners close cleanly.
Tools, glue, and winter finishing
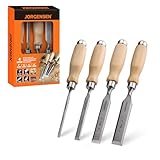
For hand-cut projects, start with a sharp backsaw, a marking knife or pencil, a square, and a chisel suited to the joint. A backsaw and chisel set is useful if you lack these tools, but inexpensive chisels need sharpening before they cut cleanly. A powered saw speeds repeated cuts, yet it does not replace a square layout or a test piece.
Use the glue maker’s temperature range and allow extra time in a cool room. Cold glue can thicken, and a joint may appear closed before it has reached a reliable cure. Keep the work and adhesive at room temperature, wipe squeeze-out before it hardens, and leave clamps on for the stated period. For a first winter project, an oil or water-based finish is easier to manage than spraying indoors. Sand progressively to about 180 grit; sanding much finer can reduce absorption for some finishes, while skipped grits leave scratches visible under raking light.
Pick one joint to repeat rather than trying to master every technique at once. A small, square box teaches layout and fit; a stool adds structural responsibility. In either case, the useful result is not just the finished object but a clear record of what fit, what split, and what you would change on the next cut.