What's inside
As an Amazon Associate I earn from qualifying purchases. This post may contain affiliate links at no extra cost to you.
Contents
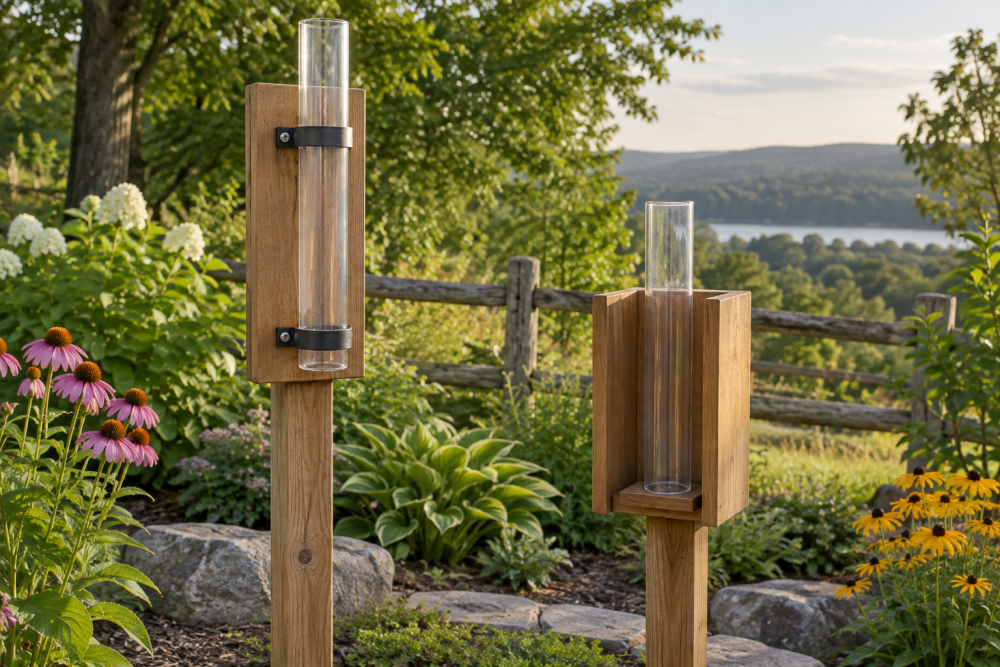
How to Build a Wooden Rain Gauge Stand with a Removable Mount
A rain gauge works best in an open spot, away from roof edges, trees, fences, and walls that can divert rain or create turbulence. A simple wooden stand gives you a stable mounting point without permanently attaching the gauge to a post or deck. The removable mount also makes it easy to bring the gauge indoors for cleaning, winter storage, or accurate emptying.
This project is suitable for a beginner with a saw, drill, and basic measuring tools. Expect to spend two to three hours on the build, plus drying time for the finish. The stand described here is about 36 inches tall, but you can change the length to suit your yard.
Materials and Tools
Use a naturally durable wood such as cedar, redwood, or pressure-treated pine. Cedar is easier and more pleasant to work with, while treated pine costs less and is usually available in more sizes. Avoid untreated indoor lumber unless you plan to protect every surface carefully; repeated wetting will cause swelling, cracking, and rot.
- One 1-by-4 board, 36 inches long, for the upright
- One 10-by-10-inch piece of 3/4-inch exterior plywood or a cedar board, for the base
- One 5-by-5-inch piece of 3/4-inch exterior plywood or cedar, for the top plate
- Two 2-1/2-inch exterior screws
- Four 1-1/4-inch exterior screws
- One 1/4-inch carriage bolt, washer, and wing nut
- Exterior wood glue
- Exterior paint, deck stain, or penetrating outdoor oil
You will also need a tape measure, pencil, square, drill, 1/8-inch and 1/4-inch drill bits, a countersink bit, a saw, clamps, and sandpaper. A cedar 1-by-4 board is the easiest all-around choice if you want a light, rot-resistant stand. For a low-cost build, treated pine is fine, provided it is dry enough to cut and you seal the cut ends.
Choose the Stand and Mount Design
The stand has three parts: a wide base, a vertical upright, and a small top plate. The rain gauge sits on the top plate and is held by a removable clamp or bolt. The base should be wide enough that wind cannot easily tip the assembly. A 10-by-10-inch base is adequate for a typical plastic gauge; increase it to 12 by 12 inches if the gauge is tall, heavy, or exposed to strong wind.
| Material | Advantages | Drawbacks | Best use |
|---|---|---|---|
| Cedar | Light, naturally rot-resistant, easy to drill | Costs more and can split near screw holes | A portable stand that will be moved often |
| Pressure-treated pine | Inexpensive and widely available | Heavy, wet when new, and can warp as it dries | A budget stand left in one location |
| Exterior plywood | Stable and easy to cut into plates | Edges need careful sealing | Base and top plate components |
For the removable mount, a carriage bolt through the top plate works with many gauges that have a flat base or mounting hole. If your gauge has no hole, use a small wooden retaining block instead. Do not drill into the gauge unless its instructions specifically allow it; a leak or distorted funnel can ruin readings.
Cut and Prepare the Pieces
Cut the upright to 36 inches, the base to 10 by 10 inches, and the top plate to 5 by 5 inches. Mark the center of the base and top plate. Set the upright on the base, centered from both edges, and mark its footprint. On the top plate, mark a centerline for the mounting bolt, but keep the hole at least 1 inch from any edge.
Sand all faces and especially round over the exposed corners. A small 1/8-inch roundover, made with sandpaper, is enough to reduce splintering and shed water. Drill pilot holes before driving screws. Cedar and dry treated lumber can split when screws are driven too close to an edge.
Assemble the Wooden Stand
Apply a thin layer of exterior wood glue to the bottom of the upright. Center it on the base, then drive two 2-1/2-inch exterior screws through the underside of the base into the upright. Countersink the screw heads slightly so the stand sits flat. Wipe away squeezed-out glue before it dries.
Position the top plate squarely on the upright. Drill two 1/8-inch pilot holes through the plate and into the upright, staying away from the carriage-bolt location. Apply glue, then secure the plate with two 1-1/4-inch screws. Check the stand from two directions with a square. A leaning upright is not just unattractive; it can make the gauge collect unevenly during wind-driven rain.
For extra stiffness, add two triangular cedar braces beneath the top plate. Each brace can be cut from a scrap triangle about 3 inches tall and 4 inches long. Glue and screw one brace to opposite sides of the upright. Braces are worthwhile if the stand is taller than 36 inches or installed in an exposed location.
Make the Removable Gauge Mount
Drill a 1/4-inch hole through the top plate at the marked location. Insert the carriage bolt from below, with a washer under the head if the wood is soft. The square shoulder under the carriage-bolt head should bite into the wood. Add the rain gauge, another washer, and the wing nut from above.
Do not overtighten the wing nut. Tighten it only enough to stop the gauge from rotating. Excess pressure can crack a plastic base or distort the gauge. If the gauge does not have a suitable hole, screw a small 3/4-by-1-inch wooden cleat to the top plate on each side of the gauge. Leave about 1/8 inch of clearance so the gauge can be lifted out without forcing it.
A stainless steel carriage bolt and wing nut set costs a little more than zinc-plated hardware but resists rust better outdoors. Zinc hardware is perfectly adequate for a sheltered stand or a temporary seasonal installation.
Finish and Install the Stand
Brush finish onto every surface, including the bottom of the base and all end grain. Two coats of exterior paint offer the most protection. A penetrating outdoor oil preserves the wood’s appearance but usually needs renewal every year or two. Let the finish cure fully before installing the gauge; uncured paint can transfer to the plastic housing.
Place the stand on firm, level ground. If the soil is soft, set the base on a paving brick or bury a small concrete paver flush with the surface. Do not permanently screw the base to a deck unless you are certain that location has unobstructed exposure. The best site is normally at least twice as far from nearby obstacles as those obstacles are tall.
Keep the gauge rim level and its opening about 30 inches above the surrounding ground. Inspect the stand after the first windy storm. Common failures include a loose wing nut, a warped base, and water entering end grain. Tighten hardware, add a second coat of finish, or widen the base rather than trying to compensate for a poor location.
For seasonal maintenance, remove the gauge by loosening the wing nut, wash it with mild soap, and check the bolt for corrosion. Store the gauge indoors during freezing weather if the manufacturer warns that trapped water can damage it. The wooden stand can remain outside if its finish and base are still sound.