What's inside
As an Amazon Associate I earn from qualifying purchases. This post may contain affiliate links at no extra cost to you.
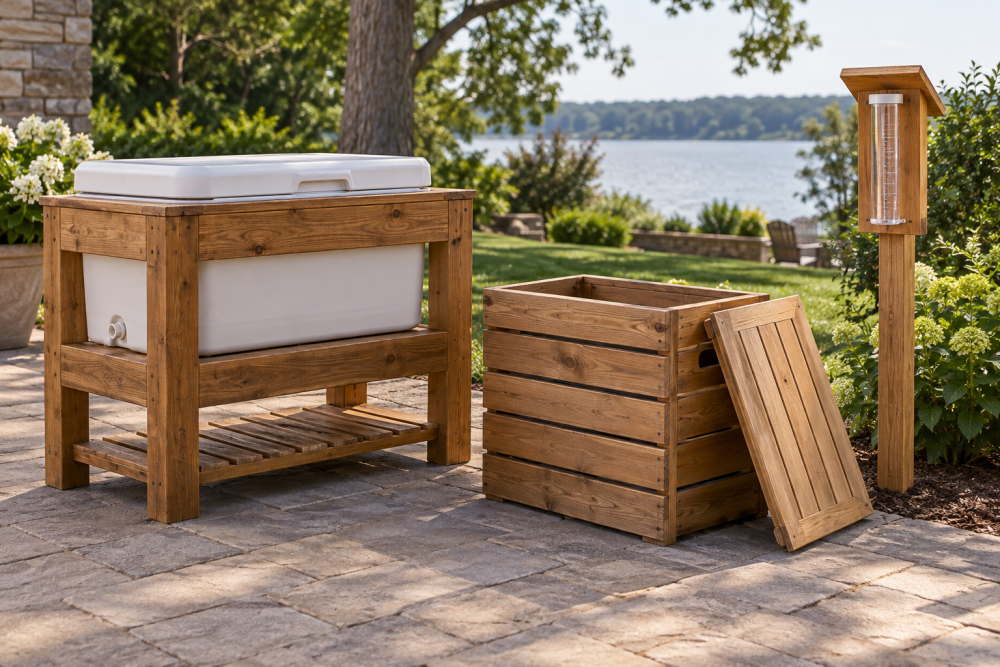
A wooden outdoor cooler box gives you a place to set drinks and keeps a removable cooler tub out of sight. This design uses a plastic cooler insert rather than a wooden box that must hold water. The lift-off slatted lid is easy to remove for access and lets the wood dry between uses. Plan on a weekend build, plus time for an outdoor finish to cure.
Contents
Size and design
Build the frame around the cooler you already own. Measure its widest points, including handles and hinges, then add about 1/2 inch of clearance on each side so it can be lifted out without binding. Leave enough room above the rim for the lid to sit flat. A common 48-quart cooler is roughly 25 by 15 inches, but dimensions vary; use your own cooler’s measurements, not the capacity label.
The example below is a simple freestanding stand with a slatted top. Adjust its inside dimensions to suit your insert. Keep the cooler’s drain plug accessible, or leave a small opening in one side of the frame. The wood supports the cooler and lid; it should not be relied on as a watertight liner.
Materials and tools
Use naturally rot-resistant lumber such as cedar, or exterior-rated boards suited to your local conditions. Cedar is light and easy to cut, but soft and easy to dent. Pressure-treated lumber is cheaper and durable for a frame, though it can be wet or prone to movement; let it dry before finishing, and avoid using it for surfaces that will contact food or drink. For this project, buy:
- Four 2×2 legs, cut to about 30 inches, adjusting for your preferred working height and cooler depth.
- Four 1×3 rails for the upper frame and four for a lower stretcher frame.
- Five or six 1×3 lid slats, cut to span the box with roughly 1/4-inch gaps.
- Exterior-rated screws, a drill/driver, saw, square, tape measure, and sandpaper.
- Outdoor finish and, if desired, a pair of handles for lifting the lid.
For a straightforward outdoor build, use exterior-rated deck screws. Stainless steel costs more but is a sensible choice near salt air or where rust staining would be a problem; coated screws are usually adequate in a sheltered yard.
Choose a lid approach
| Option | Advantages | Trade-offs |
|---|---|---|
| Lift-off slatted lid | Simple to build; no hinges; easy to remove for cleaning and drying. | Needs a place to set it while serving; not a sealed or insulated cooler lid. |
| Hinged solid lid | Stays attached and can provide a broad serving surface. | Hardware and alignment add work; trapped moisture can shorten the life of the wood. |
| Use the cooler’s own lid | Best for insulation and keeping water out of the cooler. | May sit proud of the wooden surround and look less integrated. |
A slatted wooden top is a cover and serving surface, not a replacement for the cooler’s insulated lid. Keep the original lid if you need ice to last longer or want to keep insects and rain out of the cooler.
Build the frame
Cut the legs to your chosen height. A finished rim around 30 inches from the ground is comfortable for many people, but subtract the cooler’s depth and the frame’s top thickness before deciding on leg length. Dry-fit the cooler first; a box that is too tall is awkward, while one too short may leave the cooler rim below the frame.
Make the upper frame from four rails joined between the legs. Set the rails so their inside faces provide the measured clearance for the cooler. Drill pilot holes near the ends of each rail to reduce splitting, then fasten with two exterior screws at each joint. Check that the frame is square by measuring both diagonals; they should be equal. Add the lower rails between the legs about 4 to 6 inches above the ground to reduce racking and keep the legs aligned.
Test-fit the cooler before moving on. If it catches, find the high spot and sand or trim the frame rather than forcing the cooler in. A snug fit can swell shut after rain, especially with untreated or damp lumber.
Make the lift-off slatted lid
Measure the outside of the top frame and cut the slats to overhang it by about 1/2 inch on each side. Lay them across two narrow crosspieces, spacing them evenly with 1/4-inch gaps for drainage and airflow. Keep the gaps consistent with scrap spacers while fastening. Use one screw at each slat-to-crosspiece intersection, predrilling near the ends to limit splits. The crosspieces should sit underneath the slats and run perpendicular to them.
Before installing the final screws, place the lid on the frame and check that it lifts off without rubbing. If you add handles, choose hardware that will not snag clothing or obstruct the cooler. A pair of simple recessed or low-profile pulls is easier to live with than tall handles on a lid that may be stored nearby.
Sand and finish
Sand sharp edges and splinters, working from about 80-grit to 120-grit; a finer finish is optional for outdoor furniture. Round over exposed corners slightly, especially on the lid. Apply an exterior-rated penetrating oil or water-repellent finish according to its label, including end grain and underside faces. End grain absorbs water quickly, so do not skip it. A finish made for outdoor wood furniture is a practical category to shop; a cheaper deck treatment can be fine if you accept a less furniture-like appearance and follow its use directions.
Let the finish cure fully before placing the cooler inside or setting drinks on the lid. Drying time varies with product, temperature, and humidity. Do not use an indoor-only clear coat outdoors; peeling finish traps moisture and is harder to repair than a weathered penetrating finish.
Use and maintenance
Set the box on a level surface, insert the cooler, and check that the drain remains usable. After use, remove the cooler and lift off the lid so trapped water can evaporate. Do not leave ice melt sitting against the wood, and do not treat the slats as a cutting board or a weight-rated bench. Recoat when the finish looks dry or water no longer beads, following the product’s instructions. If the lid starts to cup, looseness at the slat gaps can help it dry, but replacing warped slats is better than forcing a distorted lid flat.