What's inside
As an Amazon Associate I earn from qualifying purchases. This post may contain affiliate links at no extra cost to you.
For a simple workshop stool, either a butt joint or a half-lap can work. The better choice depends on the load, the size of the parts, and whether you want to add joint-cutting practice to the build. A screwed butt joint is fast and inexpensive, but it relies on screws and glue to resist racking. A half-lap gives the rails more wood-to-wood contact and helps keep the frame aligned, at the cost of extra layout and cutting.
As an Amazon Associate we earn from qualifying purchases at no extra cost to you.


Contents
Start with the frame
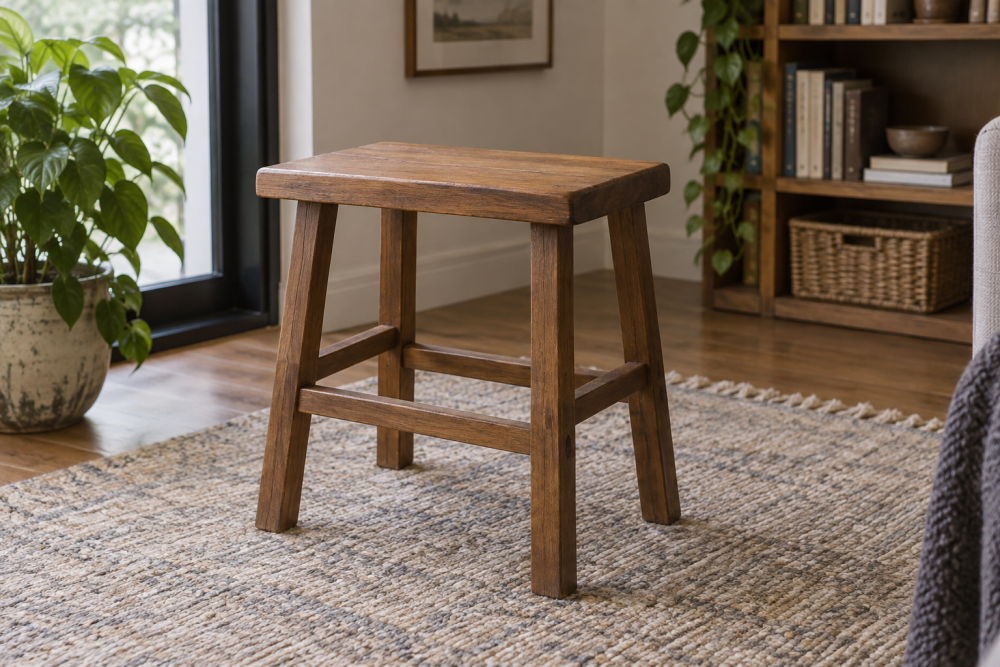
A basic stool has four legs joined by rails, with a seat fastened on top. The seat carries the downward load; the frame keeps the legs from spreading or twisting. That sideways movement, called racking, is what often loosens a quick butt-jointed stool.
For a typical shop stool about 18 inches high, use sound, straight stock and keep the rails reasonably substantial. Legs around 1½ inches square and rails around ¾ inch thick by 2½ inches tall are a practical starting point, not a structural guarantee. Actual capacity depends on wood species, defects, joint fit, glue coverage, fasteners, and workmanship. Avoid knots and splits near joints, especially in the legs.
Butt joints and half-laps compared
| Factor | Butt joint | Half-lap joint |
|---|---|---|
| How it’s made | Rail end meets the side of a leg | Matching notches let rail and leg overlap |
| Tools | Drill, clamps, square, and saw | Saw and chisel, or a suitable table saw setup, plus layout tools |
| Typical reinforcement | Glue and screws; pilot holes are important | Glue across the lap; screws or bolts can be added |
| Main weakness | Fasteners can loosen or split the leg under racking | A poor fit or deep, inaccurate cuts can weaken the parts |
| Best fit | Quick utility stool with well-placed rails | Stiffer frame or a project where accurate joinery is part of the goal |
When a butt joint is enough
Choose butt joints if the stool is for light-to-moderate shop use, the rails meet broad, flat faces, and speed matters more than traditional joinery. Use glue and at least two appropriately sized screws at each rail-to-leg connection, spaced apart vertically so the rail is less likely to pivot. For a ¾-inch rail, screws around 2 to 2½ inches long may work, but check the actual stack of parts: the screw must engage the leg without emerging through its far face.
Drill pilot holes in the legs, particularly near an edge or in dry hardwood. A screw driven without a pilot can split the leg; a screw that is too short may pull out, while one that is too long can break through. Clamp the rail in position, check the frame for square, and drive the screws only after the fit is correct. Wood glue is useful on clean, tight mating faces, but it does not make a loose, gapped joint dependable.
A basic woodworking drill bit set makes it easier to drill pilot holes sized for the screws. If the stool will see frequent side loads, add a lower stretcher or a corner brace rather than assuming bigger screws alone will cure a wobbly frame.
When a half-lap is worth the work
A half-lap is a good choice when you want a mechanically interlocking frame and can cut accurately. At a rail-to-leg lap, remove about half the thickness from each overlapping piece so their outer faces finish flush. With nominal ¾-inch stock, that means a cut close to ⅜ inch deep, adjusted for the wood’s actual thickness. Mark the cut from the measured stock, not the label on the lumber.
Cut just shy of the layout line, then pare to the line with a sharp chisel. A lap that is too tight can prevent the joint from closing; one that is too loose leaves gaps and reduces the value of the overlap. Test the joint dry before applying glue. Keep the remaining shoulders square, and don’t cut deeper than half the thickness: an over-deep notch leaves a weak section that may split under load.
For repeat cuts, a combination square helps mark consistent shoulders and depths. A half-lap is not automatically stronger in every direction. Its benefit depends on a close fit, adequate rail and leg dimensions, and sound stock. Glue the mating faces, clamp the assembly flat, and check both diagonals before the glue sets.
Build and assemble the stool
Lay out the leg and rail positions before cutting. Keep the rails level and place them far enough below the seat that fasteners will not interfere with the seat screws. Dry-assemble the base on a flat surface. Measure corner-to-corner diagonals; if they differ, adjust the frame until they match. A square frame with equal diagonals is less likely to rock or twist.
Fasten the seat after the base is square and stable. Predrill the seat to reduce splitting, and use screws long enough to hold without coming through the top. If solid wood is used for the seat, allow for seasonal movement: slots in the rails or figure-eight fasteners can let a wide seat expand and contract across its grain. A narrow plywood seat is less prone to that movement.
For either joint, wipe away glue squeeze-out and let the glue cure for the time stated on its container before loading the stool. Sand sharp corners, but do not round a joint shoulder so much that it exposes a gap.
Choose for your use
For an occasional utility stool, a carefully assembled butt-jointed frame with pilot holes, glue, and a lower stretcher is the economical choice. It needs fewer tools and is easier to repair. For a stool that will be dragged around, used often, or built as a joinery exercise, half-laps offer better alignment and a more interlocked frame when cut well. They take longer and can disappoint if the layout is sloppy.
Whichever joint you use, inspect the finished stool before sitting on it: check for cracks, loose screws, open glue lines, and rocking feet. A wobbly stool is a signal to fix the frame, not something to compensate for by adding weight or tightening a single fastener.