What's inside
As an Amazon Associate I earn from qualifying purchases. This post may contain affiliate links at no extra cost to you.
Contents
What you’re building
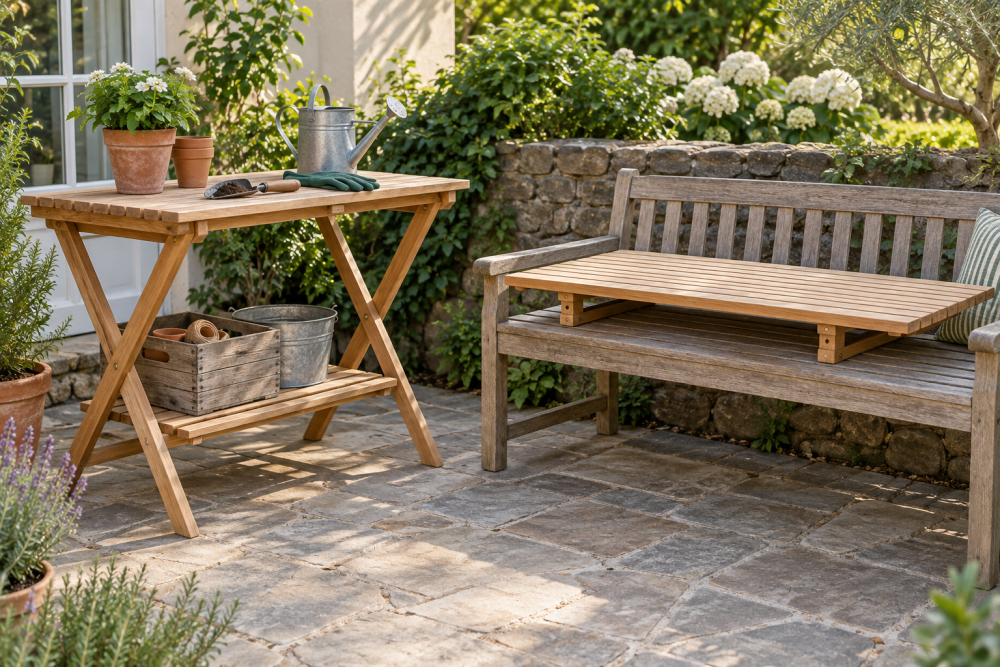
This is a removable tabletop that rests across an existing bench, turning it into a picnic surface without adding legs. Two folding support frames underneath keep the top from sliding and help it span the bench. Fold the frames flat for storage, then set the tabletop back on the bench when you need it.
Measure your bench before buying lumber. This plan suits a bench about 12 to 16 inches deep and a tabletop about 24 inches wide. The top should overhang the bench by roughly 4 to 6 inches on each side, but it must remain stable when someone leans near an edge. This is a tabletop, not a seat or a step: don’t stand or sit on it.
Materials and tools
For a top around 24 by 42 inches, use five straight 1-by-6 boards, each cut to 42 inches. Actual 1-by-6 lumber is about ¾ inch thick and 5½ inches wide, so five boards leave a top close to 27½ inches wide before trimming. If you want a true 24-inch width, rip the outside boards to fit. Alternatively, use four boards for a top about 22 inches wide.
Use two 1-by-3 boards for the folding supports, two pairs of small hinges, exterior-rated screws, and sandpaper. Cedar or a suitable exterior-rated board resists weather better than ordinary pine, but costs more and can be softer. Straight, dry pine is a reasonable low-cost choice if you seal it and store the table indoors. For a durable finish, choose an exterior water-based wood finish.
You’ll need a saw, drill-driver, tape measure, square, clamps, and a sander or sanding block. A box of exterior screws around 1¼ inches long works for joining ¾-inch boards to the supports. Check screw length against the actual wood thickness so points don’t break through the tabletop.
Choose and assemble the top
| Top material | Advantages | Trade-offs |
|---|---|---|
| Individual pine or cedar boards | Easy to cut, repair, and refinish | Boards can cup or open gaps as they dry |
| Exterior plywood, ¾ inch | Fast, flat, and fewer joints | Edges need sealing; some sheets are heavy |
| Interior plywood or particleboard | Cheapest and easy to find | Swells and delaminates when wet; poor outdoor choice |
For a first build, straight boards make a forgiving project and let you replace a damaged piece. Lay them side by side, choose the best-looking faces for the top, and leave a narrow ⅛-inch gap between boards for drainage. A spacer or pencil-width scrap helps keep gaps consistent. Clamp the boards against a straightedge before fastening so the ends stay aligned.
Cut two 1-by-3 crosspieces to the top’s width, minus about 2 inches. Place one roughly 5 inches from each end on the underside. Drill pilot holes to reduce splitting, then drive two screws through each tabletop board into each crosspiece. Keep screw heads flush, not buried deeply enough to crush the wood. Sand the top and round the corners slightly; sharp corners chip more easily and catch clothing.
Make the folding supports
Cut four legs from 1-by-3 stock, each about 10 inches long. Pair them into two upside-down U shapes using a 1-by-3 crossbar between the legs. Set the legs about 10 inches apart and fasten the crossbar near their upper ends with two screws at each joint. This leaves enough leg length below the crossbar to grip the bench sides.
Attach one support frame beneath each tabletop end, with its crossbar against the underside. Fit a pair of hinges between each crossbar and the nearest tabletop crosspiece, using the hinge screws supplied or short exterior screws that won’t emerge through the top. Position the hinges so each frame folds inward toward the center. Test the movement before tightening every screw.
The supports should sit just outside the bench’s long edges when open, preventing the top from shifting sideways. Adjust the leg spacing to your bench: leave about ⅛ to ¼ inch of clearance on each side. Too tight, and the wood may bind when damp; too loose, and the tabletop can rack or slide. If the bench has a thick lip, measure below the lip rather than at the seat surface.
Test, finish, and maintain
Set the tabletop on the bench and press down gently near each corner. If it rocks, check that the bench is level and that all four support legs touch the ground or bench structure as intended. If the top slides, reduce the support clearance or add small blocks to the inside faces of the legs. Don’t rely on friction alone if the bench is smooth or sloped.
Before applying finish, sand with 120-grit paper, then 180 grit on surfaces that will touch food or hands. Ease the edges, remove dust, and apply the finish according to its label, including the underside and end grain. End grain soaks up water quickly, so a second coat there is useful. Let the finish cure fully before placing food or a tablecloth on it.
Fold the supports flat after use and store the tabletop under cover. Standing water can stain even sealed wood, and repeated wet-dry cycles may loosen joints. Once a year, check hinge screws and the board fasteners. If a screw spins in its hole, move it slightly into fresh wood rather than forcing a longer screw through the top. A simple, light tabletop is easier to carry and store; avoid adding heavy trim unless the bench needs it for stability.