What's inside
As an Amazon Associate I earn from qualifying purchases. This post may contain affiliate links at no extra cost to you.
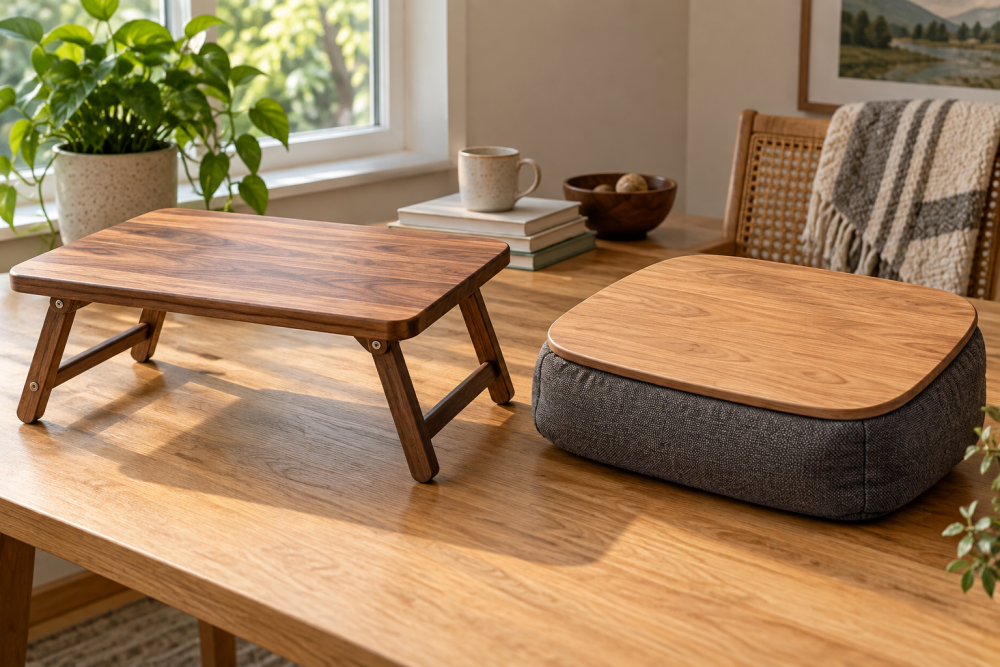
This lap desk is sized for a notebook or small laptop, with folding legs for storage and a narrow slot to keep a pencil from rolling away. The build uses a solid-wood top and simple pivoting legs. It suits a beginner comfortable drilling accurate holes; the hinges are straightforward, but sloppy alignment can make the desk wobble or fold unevenly.
Contents
Dimensions and materials
The finished top measures 22 inches wide by 14 inches deep. That leaves room for a 13-inch laptop and a mouse, though a larger computer may overhang. The legs lift the top about 8 inches, a useful starting height for sitting on a sofa or bed. Check the height against your own posture before cutting: a lap desk that is too tall can make your shoulders hunch.
Use a ¾-inch-thick hardwood board, such as poplar, maple, or birch, for the top. Poplar is often cheaper and easy to work; maple resists dents better but costs more and is harder to cut. Avoid a board with a crack where the leg pivots will go. For the legs, use straight 1-by-2 stock. You will also need two small butt hinges, screws, wood glue, sandpaper, and a finish suitable for indoor furniture.
Tools and buying choices
A circular saw with a straightedge guide can cut the top, but a jigsaw is less reliable for a square, clean edge. If you do not own a saw, a lumberyard or home center may make basic cuts for a small fee. A drill, countersink bit, square, and clamps are more important than buying a specialized jig. A set of woodworking clamps is useful for holding the board steady, though a helper and a non-slip work surface can work for this small project.
| Choice | Best for | Trade-off |
|---|---|---|
| Poplar top | Lower-cost painted desk | Dents more easily; grain can look uneven under clear finish |
| Maple or birch top | Clear finish and harder use | Costs more and takes more effort to cut and sand |
| Hinges with a stop | Repeatable leg opening angle | More hardware expense; must match the leg layout |
| Plain butt hinges | Simple, inexpensive build | Need a physical stop so the legs cannot spread too far |
For a basic version, plain butt hinges are fine. A pair of small butt hinges should have leaves wide enough for the leg and underside of the top, with screws short enough not to poke through. Check the listed screw length against your actual wood thickness rather than assuming the package will suit.
Cut the top and pencil slot
Mark a 22-by-14-inch rectangle on the board. Cut slowly, keeping the saw base against a straightedge. Check the corners with a square; even a small out-of-square cut is visible once the edges are sanded. Ease the sharp edges with 120-grit sandpaper, then finish sanding with 180 grit.
Make the pencil slot near the back edge, centered from side to side. A practical size is ¾ inch wide by 8 inches long, with the near edge about 1½ inches from the back edge. Confirm that the slot will not overlap a leg hinge or screw location underneath. Drill a ¾-inch hole at each end of the marked slot, then connect the holes with a jigsaw. A rasp or sanding drum can smooth the inside edges. Keep the slot shallow only if you are routing a groove; a through-slot is easier to make with a jigsaw and holds a pencil securely.
Test with an ordinary pencil before finishing. If it binds, sand the sides until it slides in and out without forcing. A slot that is too wide lets a pencil rattle and may catch small items; about ¾ inch is a useful balance for standard pencils and many pens.
Make and fit the folding legs
Cut four leg pieces from 1-by-2 stock, each 10 inches long. Round the bottom corners slightly so they do not snag fabric. Pair the legs at each end of the desk, with one pair hinged beneath the top near the left side and the other near the right. Set each hinge about 2 inches in from the end and centered front to back. This arrangement keeps the legs away from the pencil slot.
Lay the desk upside down on a flat surface. Position the legs so they fold toward the center and open outward without hitting one another. Mark the screw holes, drill pilot holes, and attach the hinges. Pilot holes reduce the chance of splitting, especially near the end grain. Use screws that bite firmly but do not emerge through the top; on ¾-inch stock, screws longer than about ½ inch are risky once the hinge leaf is included.
Butt hinges alone do not limit how far legs spread. Add a short wooden stop block beside each leg pair, or a simple strap between the legs and underside, so the legs stop at a stable angle. Open the legs and press down gently on the top before use. If they keep spreading, shift the stop inward or add a stronger one. Do not rely on friction in a loose hinge to hold the desk upright.
Sand, finish, and test
Sand the top, edges, slot, and legs through 180 grit. Remove dust with a vacuum or a clean, dry cloth. Apply a thin coat of water-based polyurethane or another indoor furniture finish, following its label for drying and recoat times. Two or three thin coats usually give better results than one heavy coat, which can puddle in the pencil slot. Lightly sand between coats if the instructions call for it.
After the finish cures, open and close the legs several times. Check that all four feet touch the floor and that the desk does not rock on a flat surface. A short leg can be corrected by sanding the longest feet, not by forcing a twisted frame flat. Test the desk with a laptop-sized load before using it on your lap, and keep hot drinks away from electronics and the wood surface. Folding legs are convenient for storage, but this design is not a stool or a support for standing body weight.