What's inside
As an Amazon Associate I earn from qualifying purchases. This post may contain affiliate links at no extra cost to you.
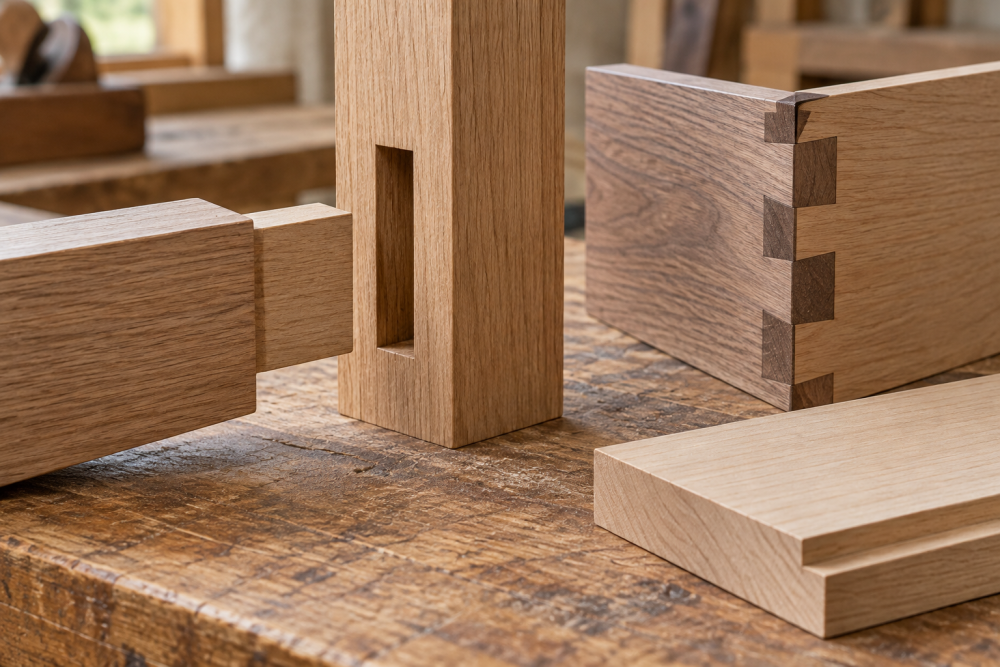
Winter is a good time to learn hand-fit box joints. The work is compact, quiet, and manageable at a bench while glue and finishes cure slowly in a cold shop. A box joint is simply a row of square fingers cut into two boards so they interlock. The machine can cut them quickly, but fitting them by hand teaches the more useful skills: accurate marking, controlled sawing, careful chiseling, and patient test-fitting.
As an Amazon Associate we earn from qualifying purchases at no extra cost to you.



Contents
Why Winter Projects Work for This Skill
Choose projects with short boards and visible joints. You want enough repetition to build muscle memory, but not so much material that one bad cut ruins a week of work. Small boxes, trays, and drawer organizers are ideal because their parts can be cut indoors and their imperfections are easy to inspect.
Keep the wood acclimated before marking it. Store boards in the room where you will build for at least several days, preferably one to two weeks for thicker stock. A board that shrinks or cups after you cut the joints can turn a good-fitting corner into a gap. Straight-grained hardwood between 9 and 15 mm thick is a forgiving starting point. Softwood is cheap, but its fibers crush easily at the fingers.
Best Projects, Ranked by Difficulty
| Project | Recommended stock | Joint practice | Main risk |
|---|---|---|---|
| Four-sided test box | 9–12 mm poplar or maple | One joint at each corner | Learning to keep the saw square |
| Open-top winter tray | 12–15 mm hardwood | Four long, visible corners | Accumulated errors around the perimeter |
| Tea or keepsake box | 9–12 mm cherry, maple, or walnut | Small fingers and clean inside corners | Overcutting the baselines |
| Drawer organizer | 9–12 mm inexpensive hardwood | Repeated identical corners | Parts becoming interchangeable in the wrong way |
Start with the test box even if you have some experience. Make it roughly 150 mm square and 75 mm high, using two or three fingers per corner. Large fingers, around 20–25 mm wide, are easier to saw and chisel accurately. Once the fit is reliable, move to a tray with four or five fingers per corner.
Tools Worth Buying—and Where to Save
The essential saw is a fine-toothed backsaw that cuts straight without flexing. A 14–16 teeth-per-inch dovetail or carcass saw is suitable for stock up to 12 mm thick. A general-purpose tenon saw can work, but its wider kerf removes more material and makes small fingers harder to fit.
If you need a saw, compare 14–16 TPI dovetail backsaws by plate thickness, handle comfort, and whether the teeth are filed for a rip cut. You do not need an expensive saw for this project. A reasonably stiff, sharp budget saw is better than a premium saw with a damaged or poorly maintained edge.
You also need a marking knife, a square, a sharp pencil, a fine marking gauge, and chisels. A 6 mm chisel handles narrow fingers; a 12 mm chisel removes waste efficiently. A wooden mallet is safer than a metal hammer because it is less likely to mushroom the chisel handle or bruise the work.
Buy basic woodworking bench chisels if your current chisels will not hold an edge. You do not need a matched boutique set. One or two properly sharpened chisels are enough. A flat reference surface and abrasive sheets can sharpen them, although a honing guide makes the first few sharpening sessions easier.
Marking and Sawing the Joint
Mill all boards to the same thickness and square one reference edge on each. Mark the inside faces and keep the orientation consistent. For a beginner’s box, divide the end into equal fingers 20–25 mm wide. Use a marking gauge to scribe the shoulder depth, usually the full board thickness. A knife line is more useful than a pencil line because it creates a physical wall for the saw and chisel.
Transfer the layout from the first board to its mate with a sharp pencil or knife. Do not measure each board independently; small arithmetic errors accumulate. Mark waste areas with a pencil and put a clear diagonal across them. Many first attempts fail because the maker removes the wrong strip at one corner.
Clamp the board vertically in a vise, with the waste facing you. Start the saw with short, light strokes against the far edge of the knife line. Keep the blade square to the face and edge. Saw just on the waste side of the line, not through its center. Stop at the shoulder line. A 1 mm overcut at the baseline can leave a visible gap, especially on a small box.
Chiseling and Test-Fitting
Do not try to chop an entire waste section out in one blow. Make a shallow first cut about 1–2 mm deep, then deepen it gradually. Pare from both faces when possible. Chopping from one side alone can split fibers beyond the baseline.
Use the chisel bevel toward the waste for controlled removal, then switch to bevel-up paring when cleaning the shoulder. Keep the chisel flat against the reference face. If the chisel leans, it changes the width of the socket and creates a tapered joint.
Test-fit the corner before cutting the matching corner. The fingers should enter with firm hand pressure and close fully without a hammer. A joint that requires force can split a thin board; one that falls apart will not become stronger from glue. Find the tight spot with pencil rubbed on the mating finger, then remove only the marked area with one or two paring strokes.
A Practical Winter Build Sequence
On the first evening, prepare and label the boards. On the second, mark and saw one corner. Spend the next session fitting and correcting it before copying the layout to the remaining corners. This slower sequence prevents you from repeating a mistake four times.
After dry-fitting the complete box, check the diagonals. If they differ by more than about 2 mm on a 300 mm box, the assembly is noticeably out of square. Correct minor error by adjusting the longest diagonal during clamping. For a badly twisted box, do not force the joints; recut or remake the worst part.
Glue with a thin, even coat on the finger faces. Box joints have plenty of surface area, so excess glue mainly creates cleanup work inside the corners. Use clamps or tape to hold the assembly, check square again, and leave it undisturbed for the adhesive’s stated cure time. Winter temperatures below 10°C can slow many woodworking glues, so keep the project and glue in a warm room.
Finishing Without Hiding the Work
Trim proud fingers with a sharp block plane or flush-cut saw after the glue cures. Sanding alone can round the corners and make the joint look uneven. Break the outside edges lightly with 180-grit paper, then progress to 220 grit if the wood will receive oil or varnish.
For a first project, a penetrating oil is forgiving and easy to repair. A film finish gives better spill resistance on a tea box or tray but makes dust and brush marks more obvious. Leave the inside corners crisp; aggressive sanding there removes the evidence of accurate fitting rather than improving the result.